
Platform Integrations
Connect your website so you can capture leads with the fivebucks.ai lead widget. You connect each platform for Traffic first; then you enable Lead Generation on the same integration and add the widget to your site.
What are Platform Integrations for Lead Generation?
Platform integrations let you add the fivebucks.ai lead-capture widget to your website or blog. Once connected, visitors can submit their details (e.g. email, name) via popovers or forms—so you grow your lead list without leaving fivebucks.ai.
You must connect each platform for Traffic Generation first. Then, on the same integration card, you enable Lead Generation and install the widget on your site.
Supported platforms: WordPress.com, WordPress Self Hosted, Wix, Shopify, Ghost, Blogger.
Before You Begin
- Your CMS (e.g. WordPress, Wix, Shopify) is already connected for Traffic Generation on the Integrations page.
- You have Admin or Owner access in fivebucks.ai.
- You know which domains (e.g. yoursite.com) should show the widget.
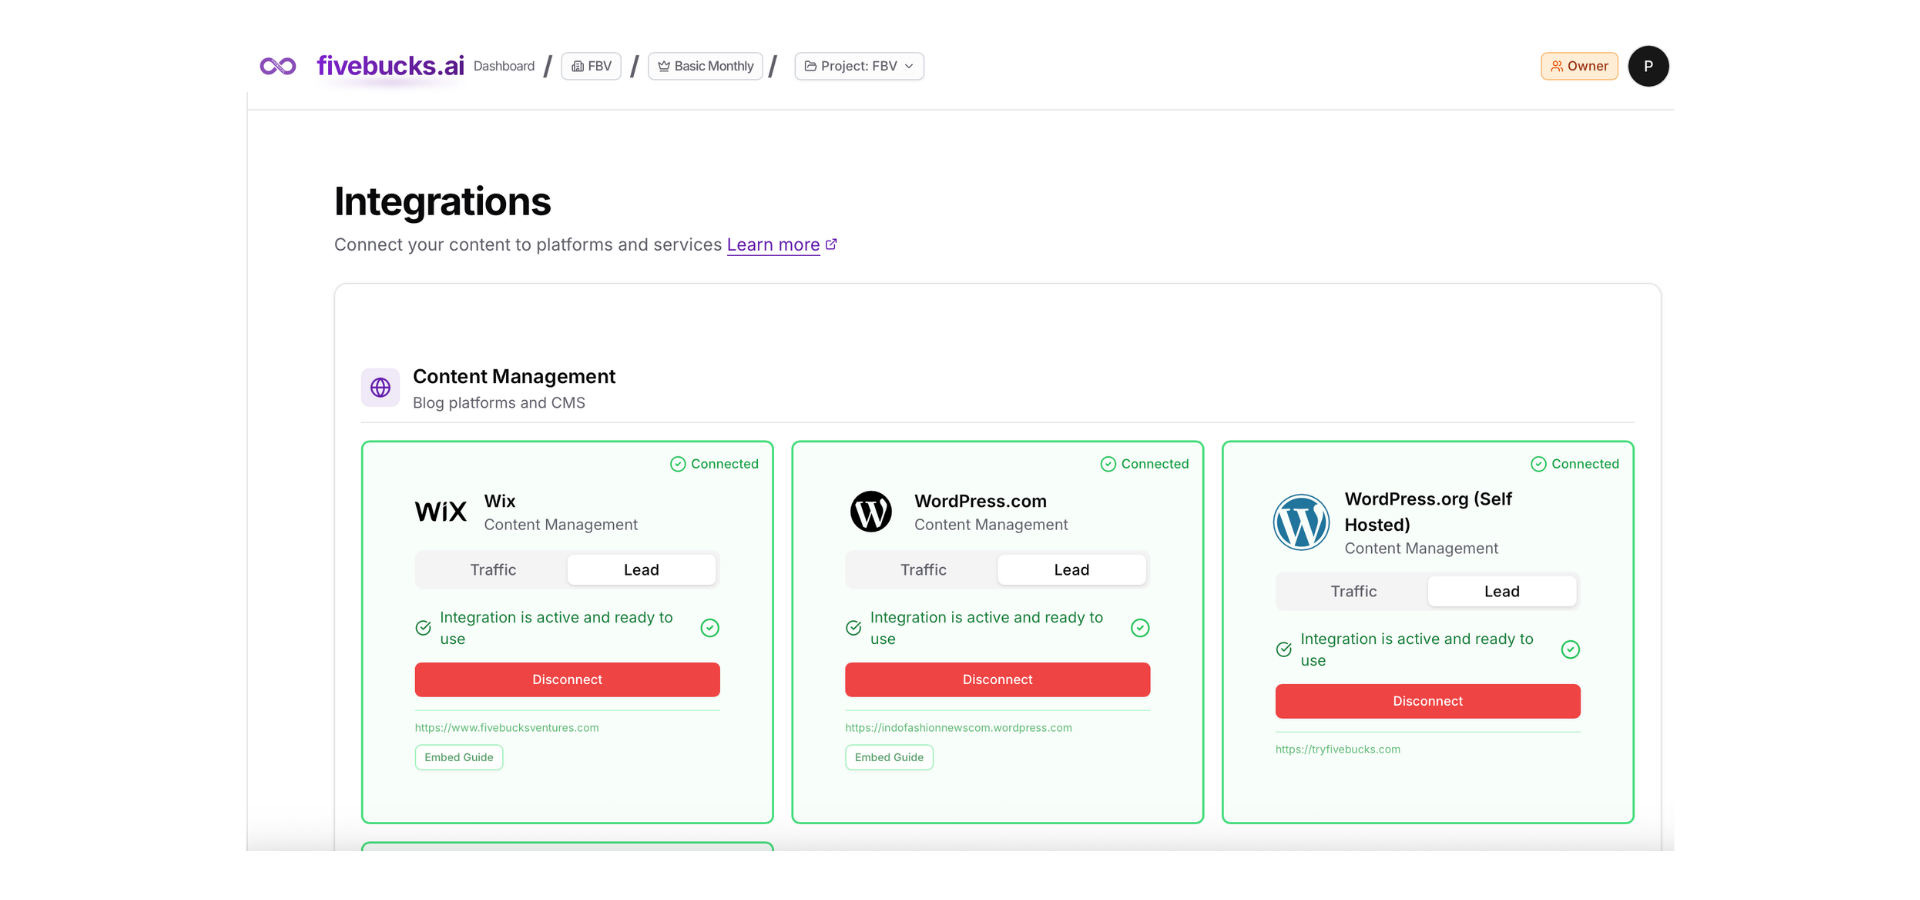
Navigate to Integrations
From your dashboard, click Integrations in the sidebar. You'll see all available platforms. Each card has two tabs: Traffic and Lead. Use Traffic to connect (or manage) the CMS; use Lead to enable the lead-capture widget.
Loading image...

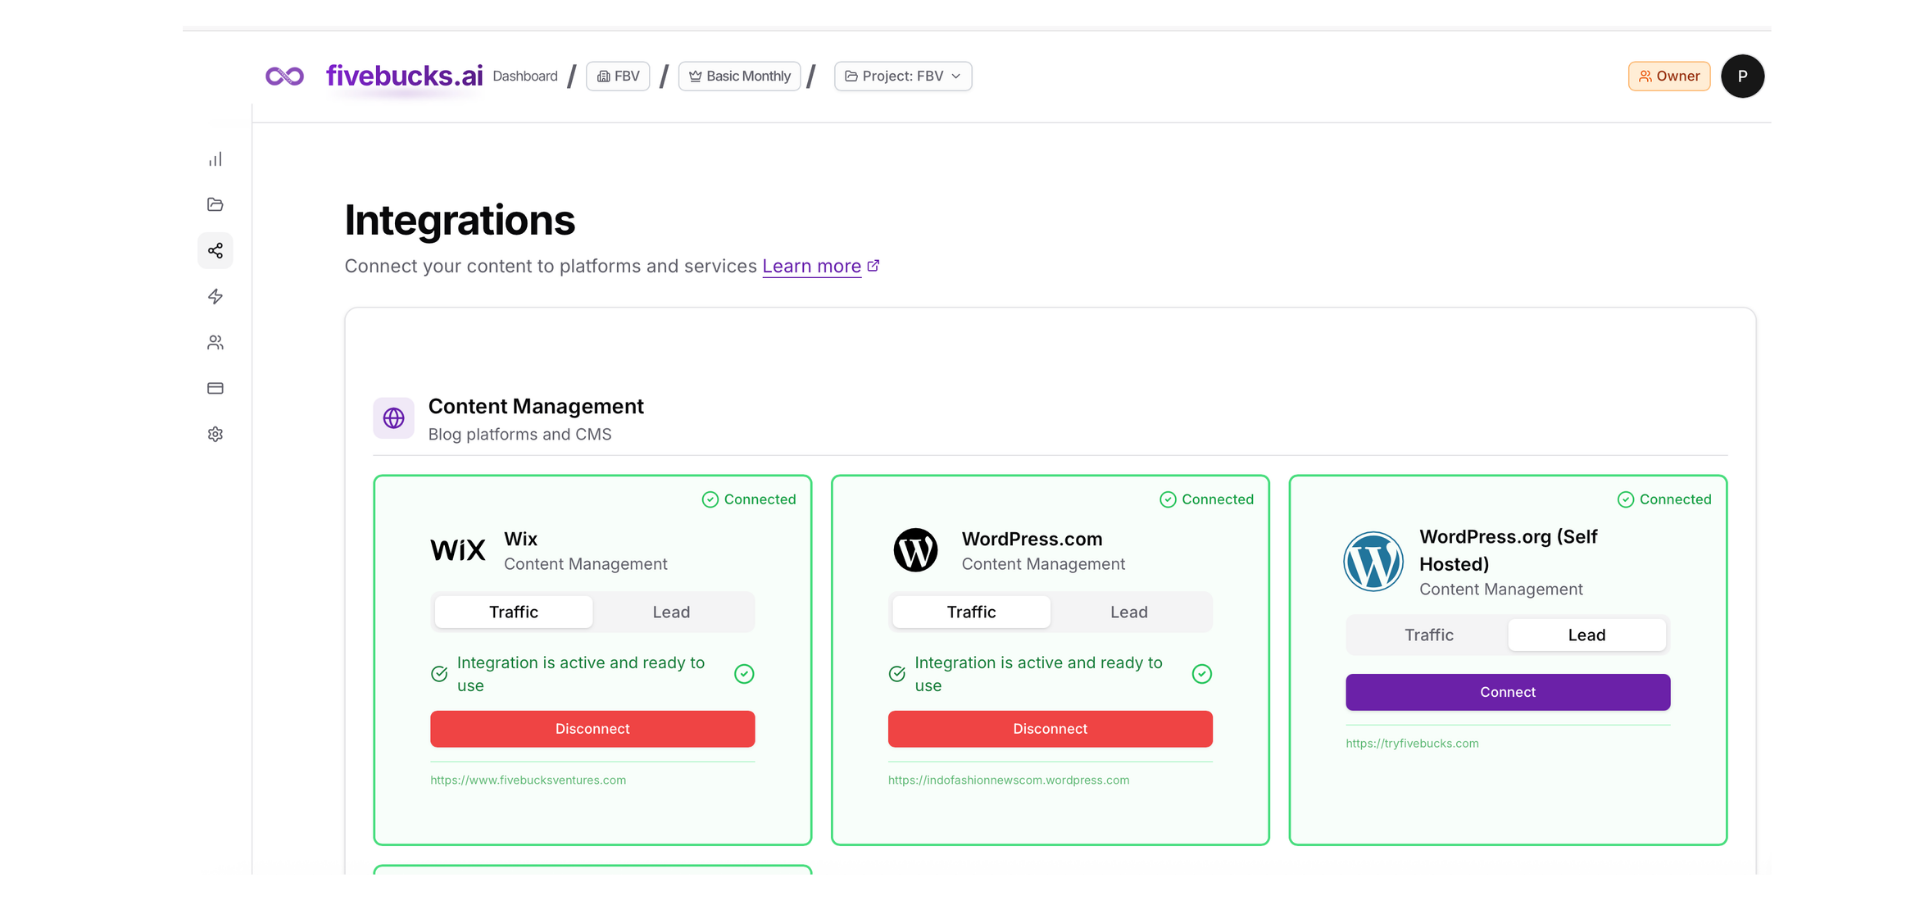
Open the Lead Tab and Click Connect
For the platform you want to use for lead capture (e.g. WordPress.com), make sure it's connected on the Traffic tab. Then open the Lead tab. If Lead Generation isn't enabled yet, click Connect.
Loading image...
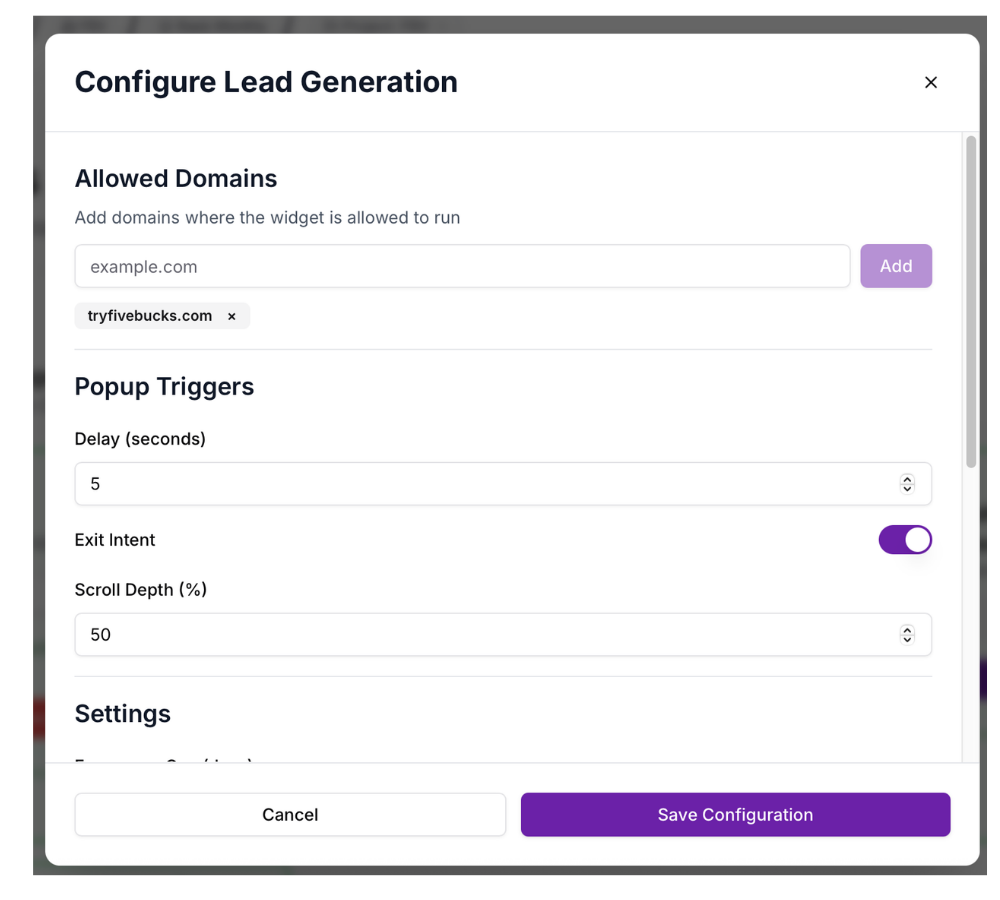
Configure Lead Generation
A configuration modal opens. Set:
- Allowed domains: The website domains where the widget may run (e.g. yoursite.com). Usually pre-filled from your connected site.
- Triggers: When to show the widget (e.g. after a delay in seconds, on exit intent, or when the user has scrolled a percentage of the page).
- Frequency cap (days): How often the same visitor can see the widget (e.g. once per 7 days).
- Privacy URL and Consent text (optional but recommended for compliance).
- Collect website: Whether to store the page URL with the lead.
Click Save to enable Lead Generation for this integration.
Loading image...
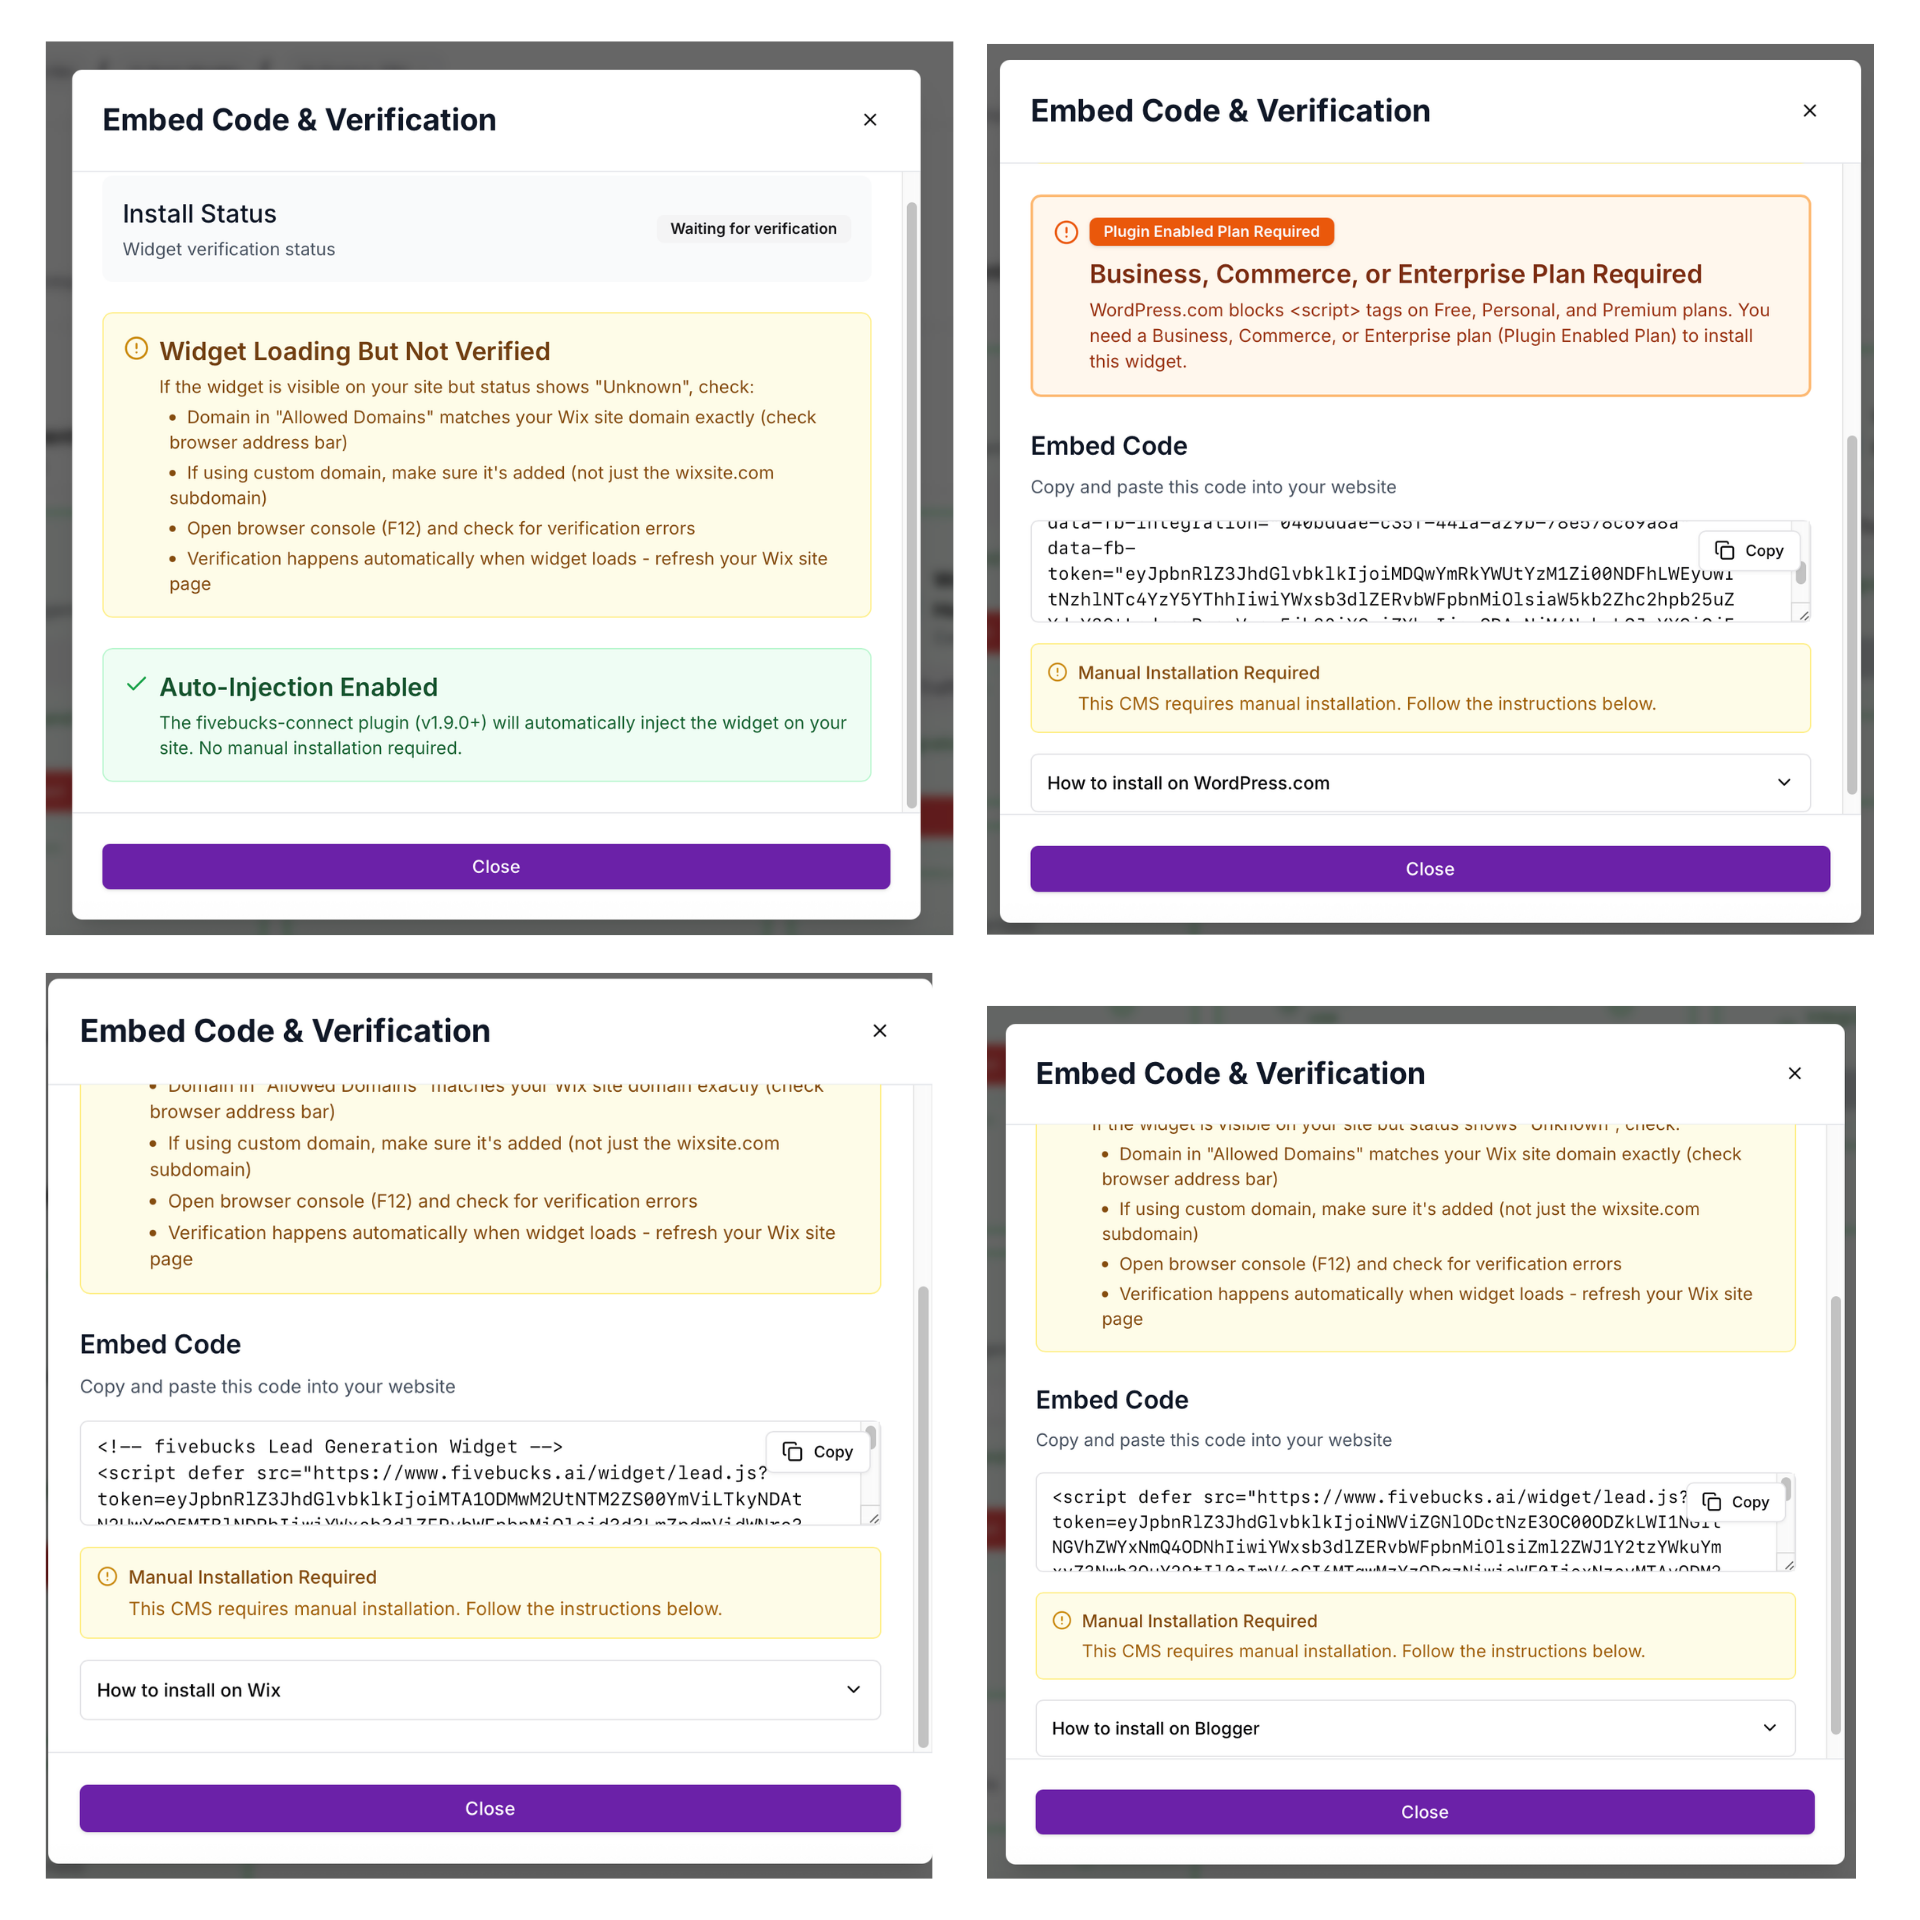
Install the Widget on Your Site
After saving, the Lead tab shows Connected. For most platforms you'll need to add a small code snippet to your site. Click Embed Guide to open step-by-step instructions and copy the snippet.
WordPress.com: Custom HTML block or theme editor.
WordPress Self Hosted: If you use the fivebucks.ai plugin (v1.9.0+), the widget may be injected automatically; otherwise add the snippet manually.
Wix: Settings → Custom Code → add to Head.
Shopify: Online Store → Themes → Edit → add Custom Liquid section with the snippet.
Ghost: Settings → Code Injection → Site Header.
Blogger: Layout → Add a Gadget → HTML/JavaScript; paste the snippet.
Loading image...
Step 5: Verify and Disconnect (Optional)
Disconnect: To turn off Lead Generation for a platform, open the Lead tab and click Disconnect. Your Traffic connection stays; only the lead widget is disabled.
- Disconnect: To turn off Lead Generation for a platform, open the Lead tab and click Disconnect. Your Traffic connection stays; only the lead widget is disabled.
Loading image...