
Email Campaigns
Send one-time email blasts to your lists or run automated multi-email sequences for segments—all from the Workflows page.
What are Email Campaigns and Workflow Automation?
A single email blast sent once to your chosen audience.
You click Start Campaign and emails send immediately (within domain limits).
Use for: announcements, promotions, event follow
ups, one off outreach.
- Use for: announcements, promotions, event follow-ups, one-off outreach.
2. Workflow Automation
- A multi-email sequence (e.g. welcome → follow-up → offer) that runs on a schedule.
- Audience: A Lead Segment only (see Segments). New leads that match the segment are added automatically.
- The system runs daily at the time you choose (e.g. 4 AM, 10 AM, or 9 PM UTC) and sends the next email in the sequence to each lead.
- Use for: nurture sequences, trial follow-ups, re-engagement, onboarding.
Both are created and managed from Lead Generation → Workflows. When you create a new workflow, you choose the One-Time Campaign tab or the Workflow Automation tab.
Before You Begin
- At least one verified domain (see Domain Verification)
- At least one confirmed email signature (see Email Signatures documentation)
- Leads imported or synced into your project (see Lead Management)
- Brand assets configured for email personalization (optional, see Brand Assets)
- Sufficient quota (0.01 quota per email sent)
Go to Workflows
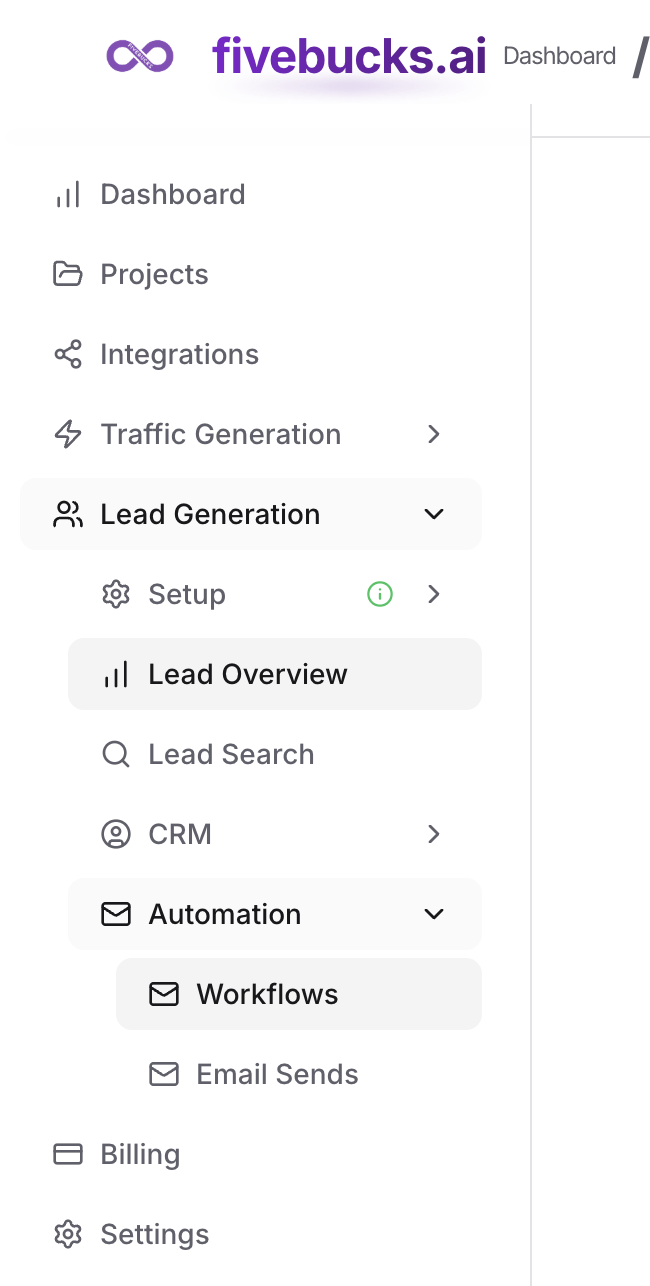
From your dashboard, click Lead Generation in the sidebar, then click Workflows.
Loading image...
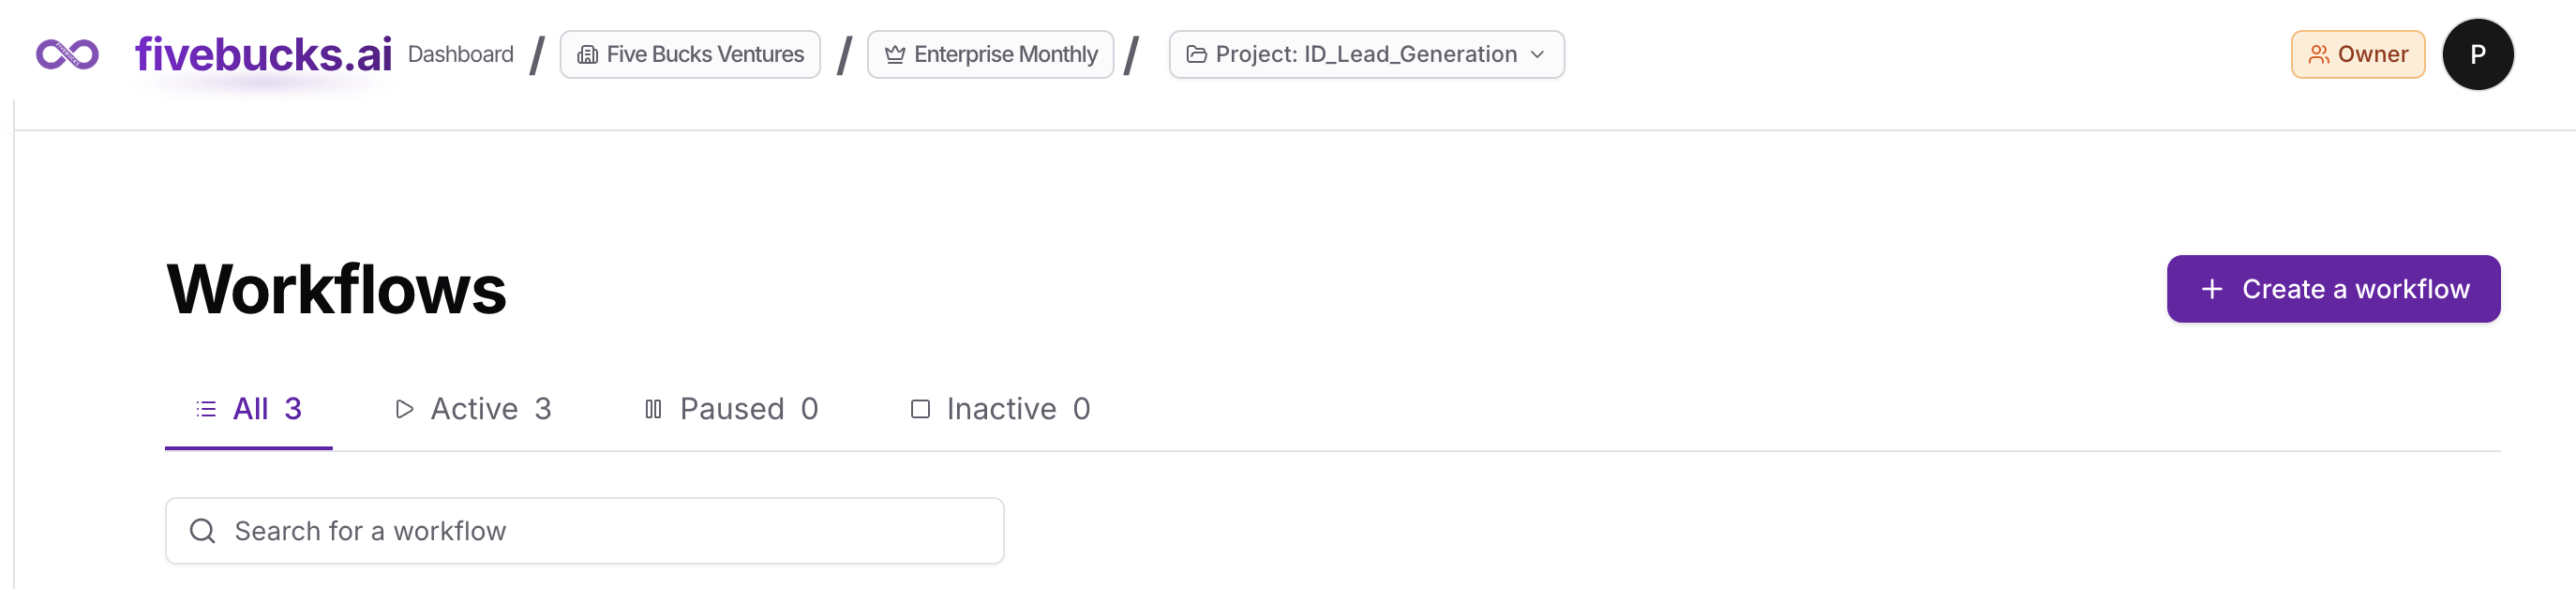
You will see your list of workflows—both one-time campaigns and workflow automations—with status (Active/Paused/Inactive) and stats (sent, opened, clicked).
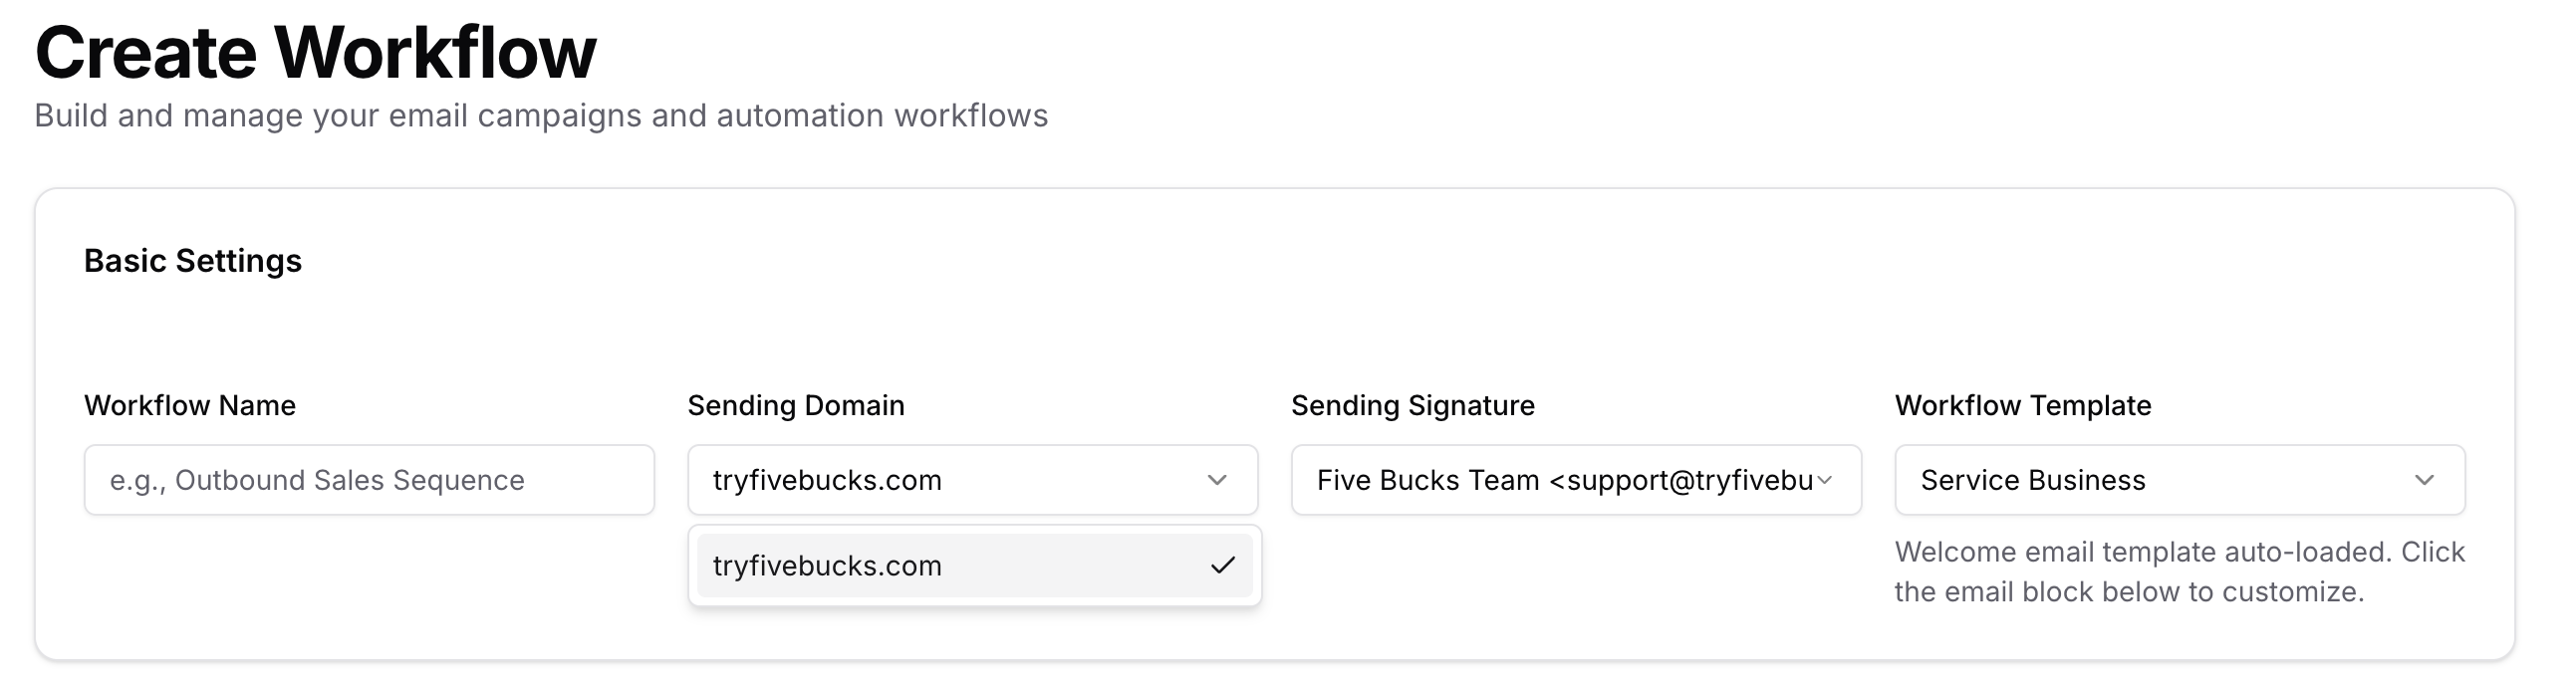
Create a New Workflow
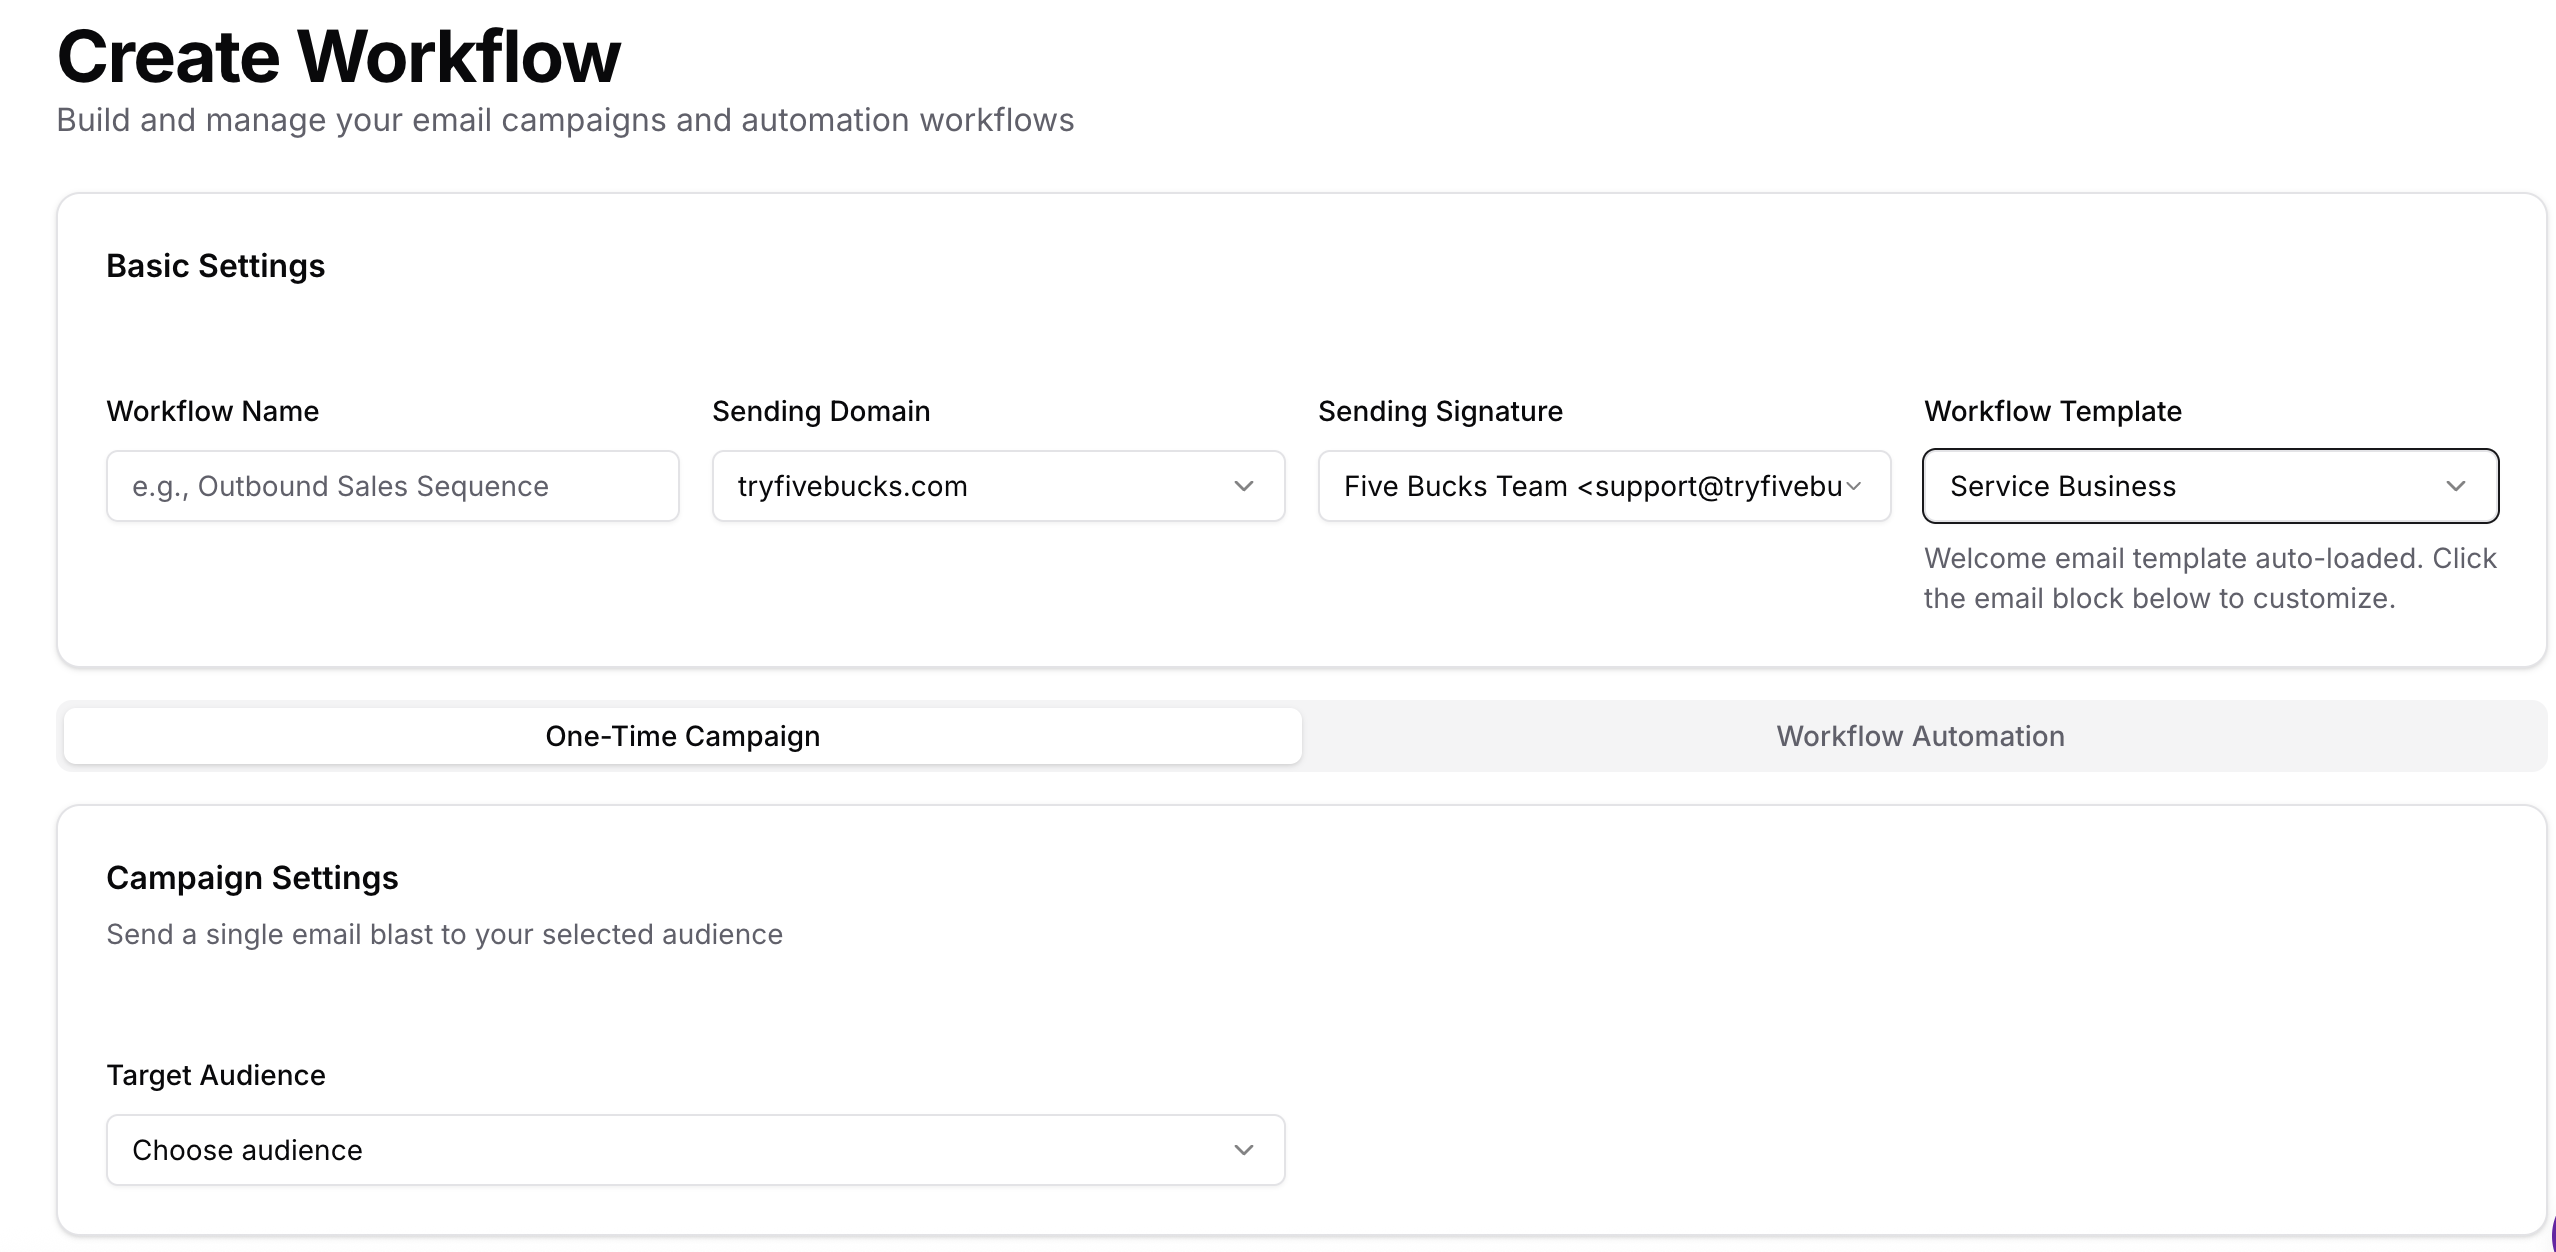
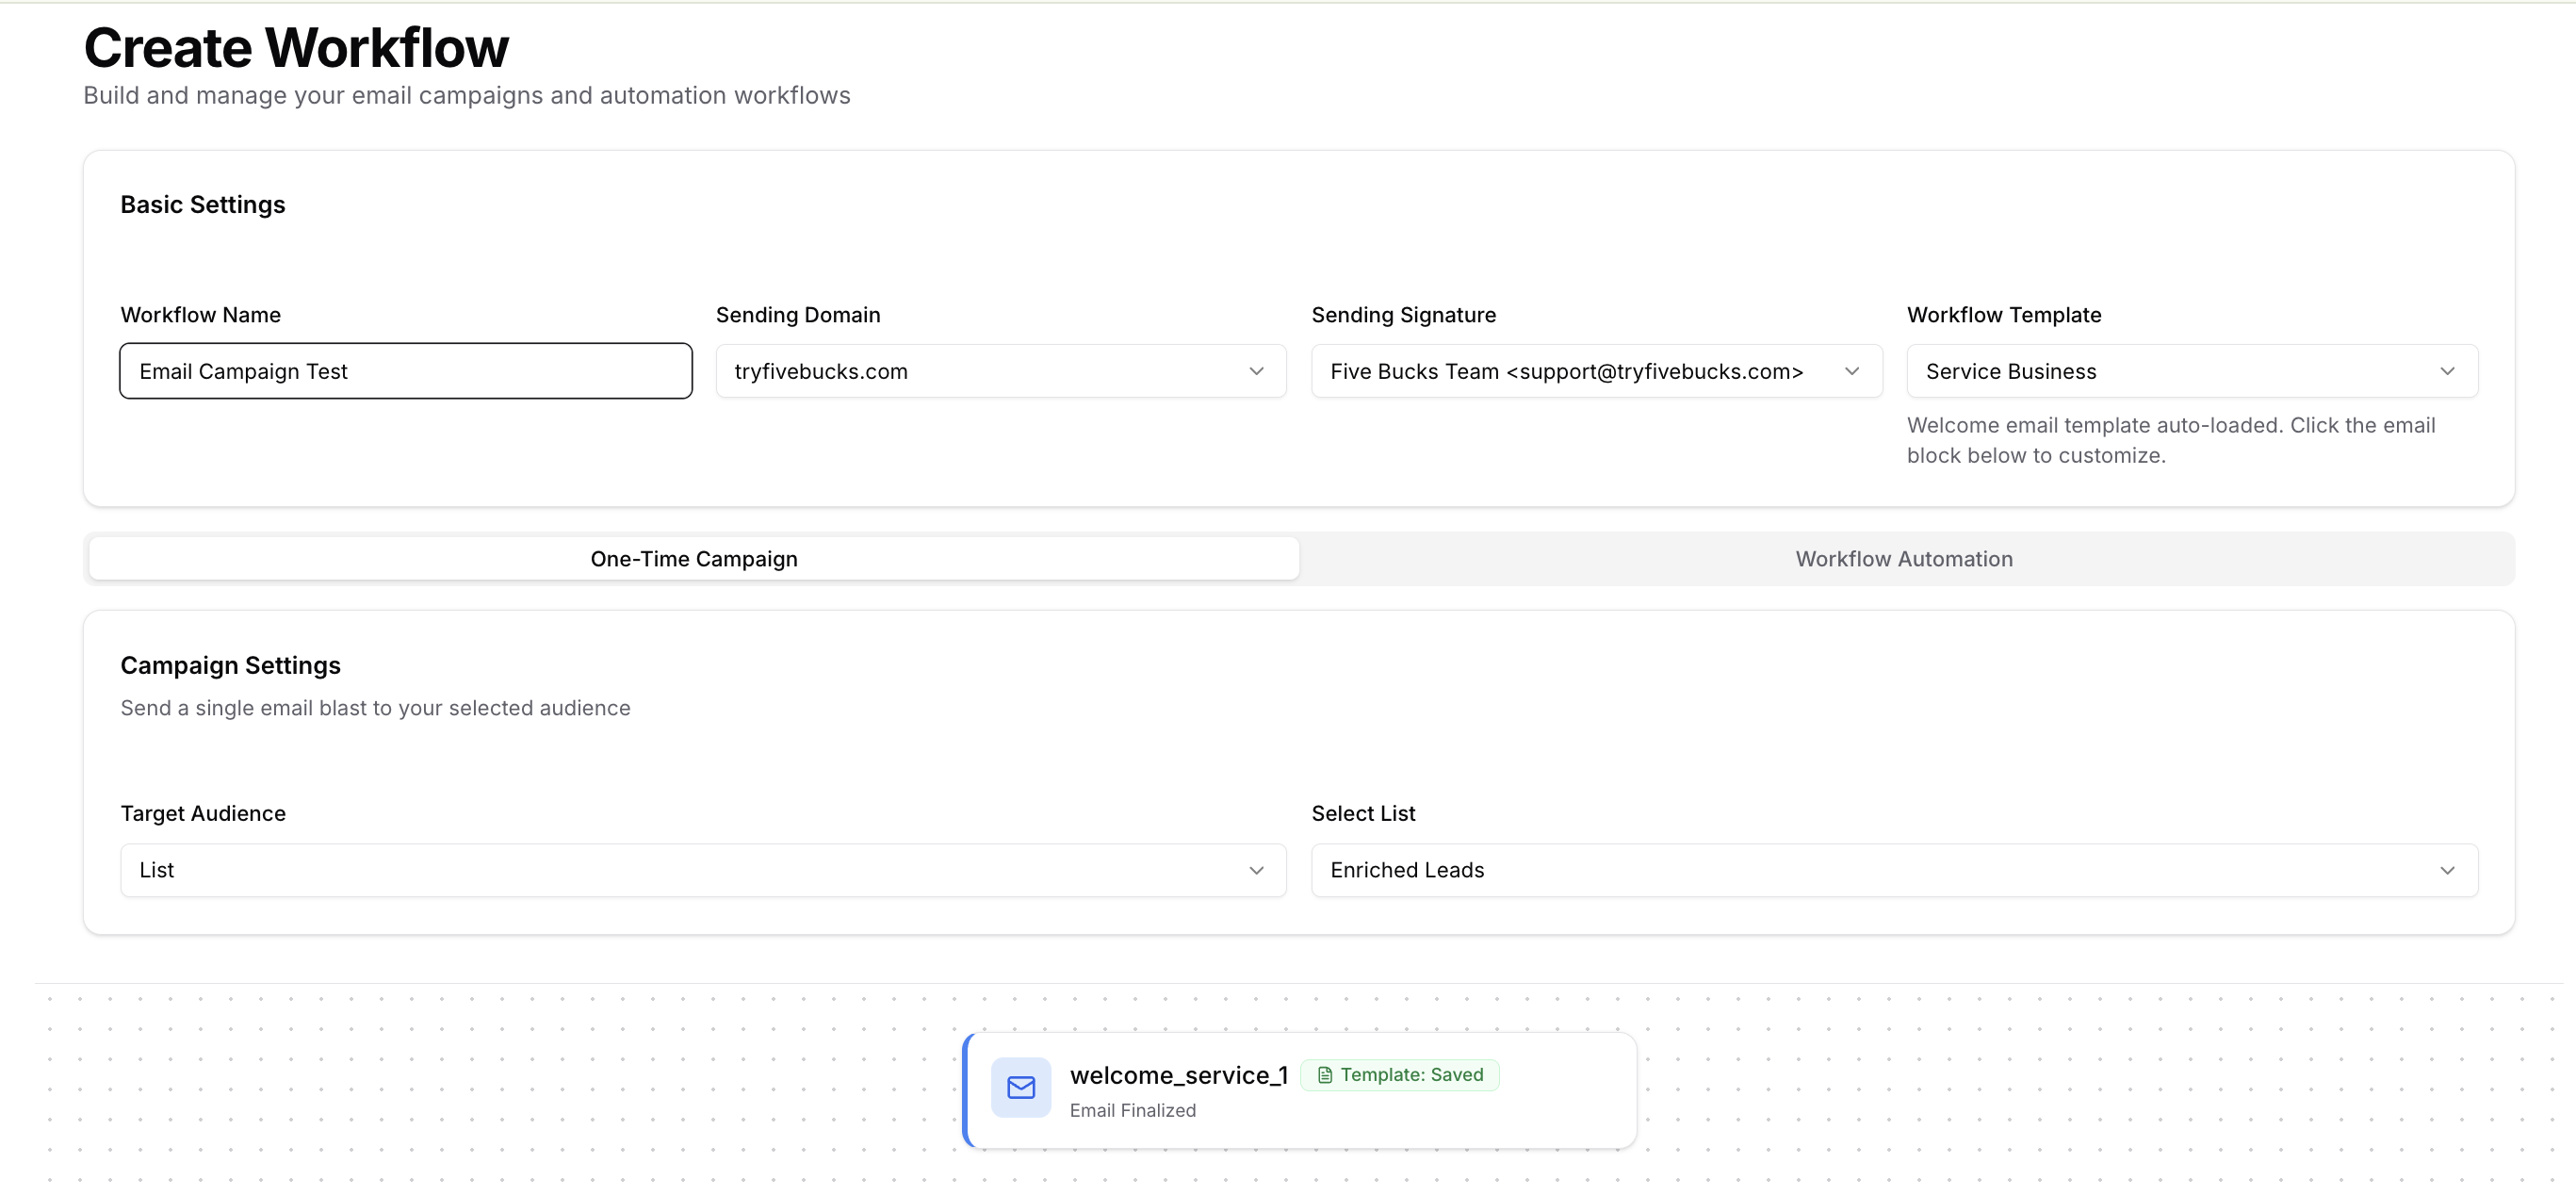
Click "Create a workflow" (or "Create Workflow") to open the workflow builder.
Loading image...
You will see two tabs at the top:
One
Time Campaign Single email blast to a list or all leads.
Workflow Automation
Multi email sequence sent to a segment on a schedule.
Choose the tab that matches what you want, then fill in basic settings (name, domain, signature, optional template) and the section below for that tab (audience and, for workflows, schedule).
Loading image...
Pro Tip
Choose Your Audience (Targeting)
Who receives the emails depends on which tab you chose.
Loading image...
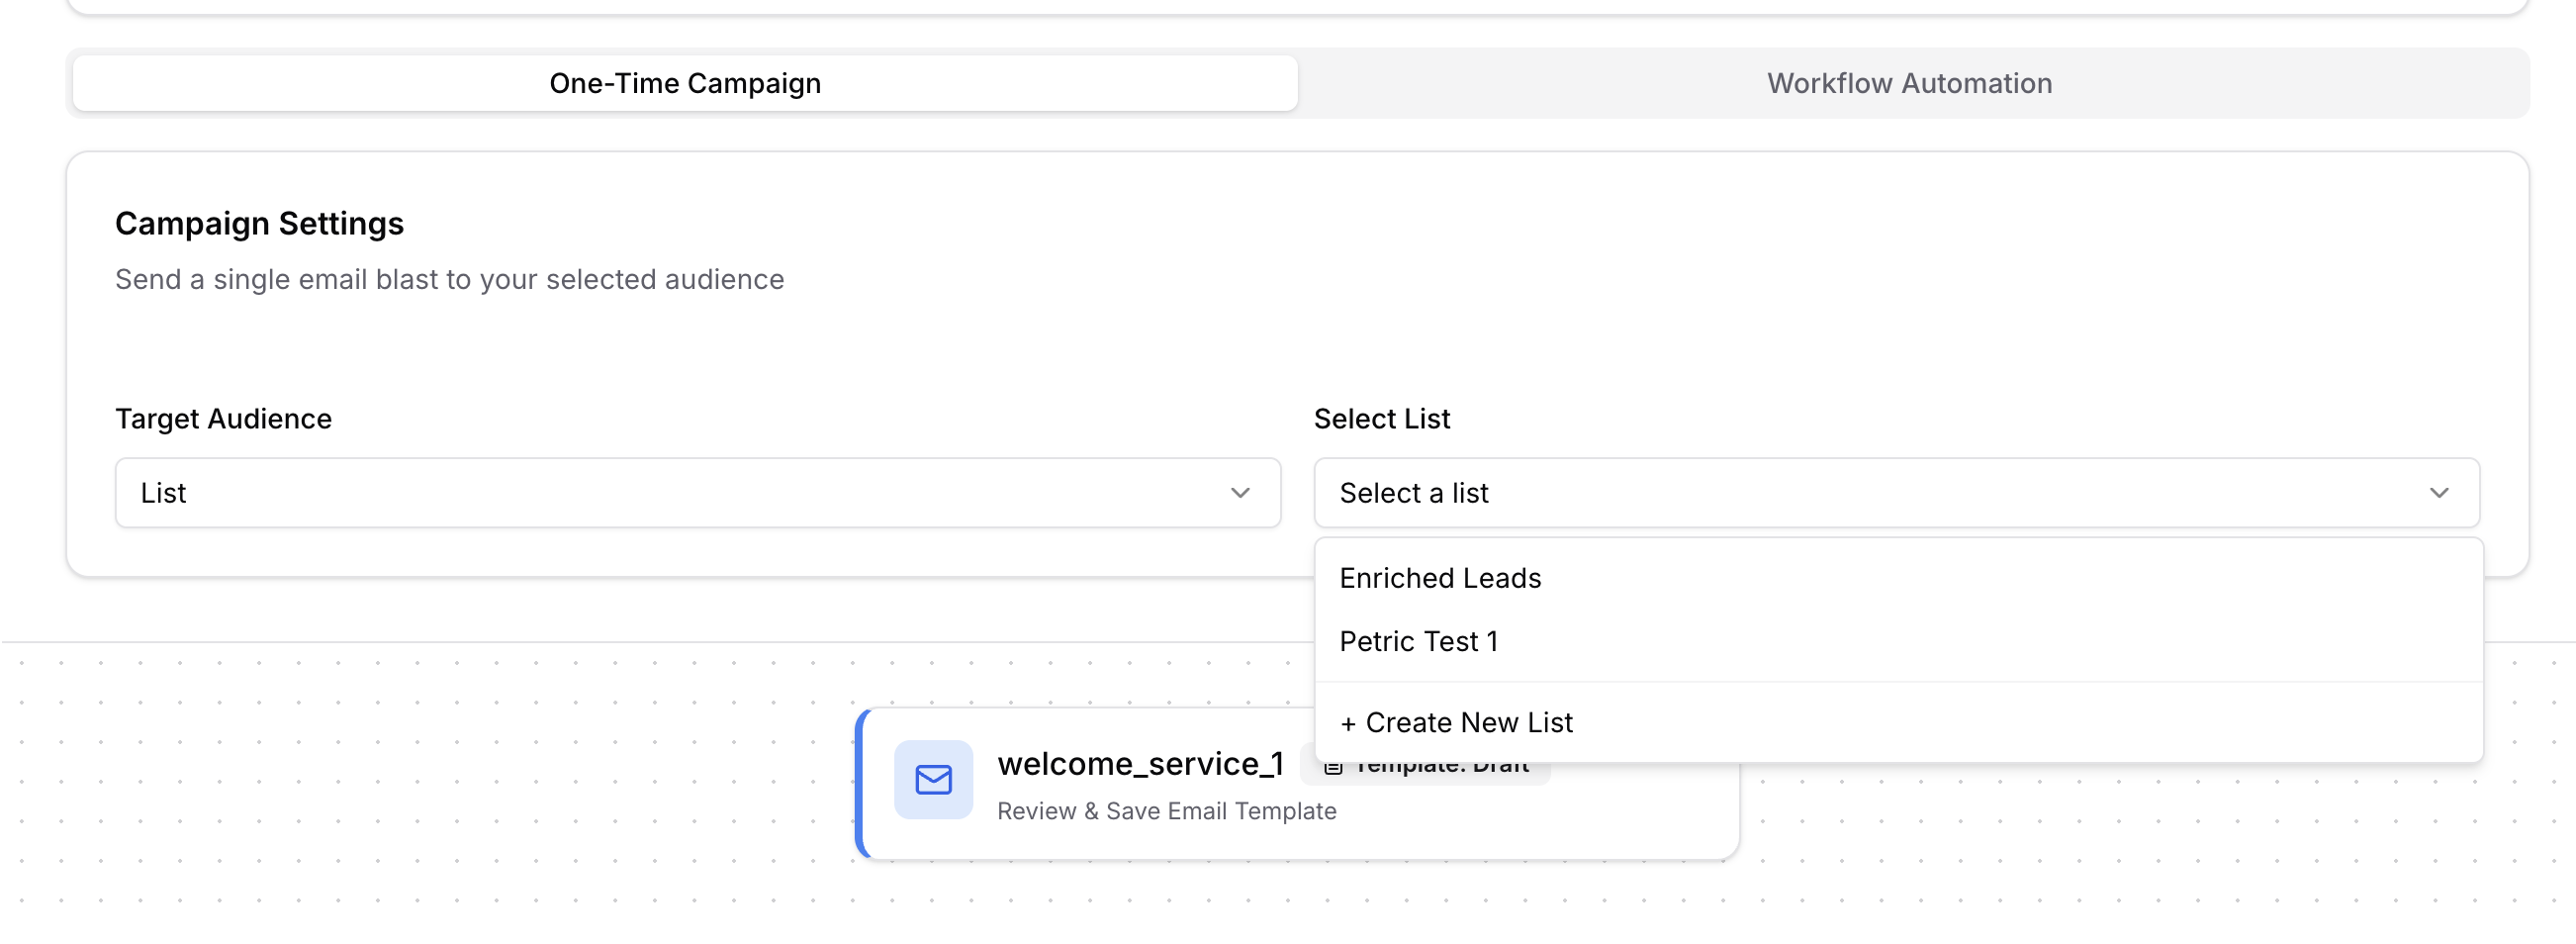
For One-Time Campaign
- All Leads — Every lead in your project. Good for announcements or launches; can use a lot of quota.
- List — One specific Lead List (e.g. "Webinar Attendees", "Trade Show Contacts"). Pick the list from the dropdown. Use for event follow-ups, imported lists, or any one-time blast to a fixed list.
You cannot target a segment for a one-time campaign; segments are used only for Workflow Automation.
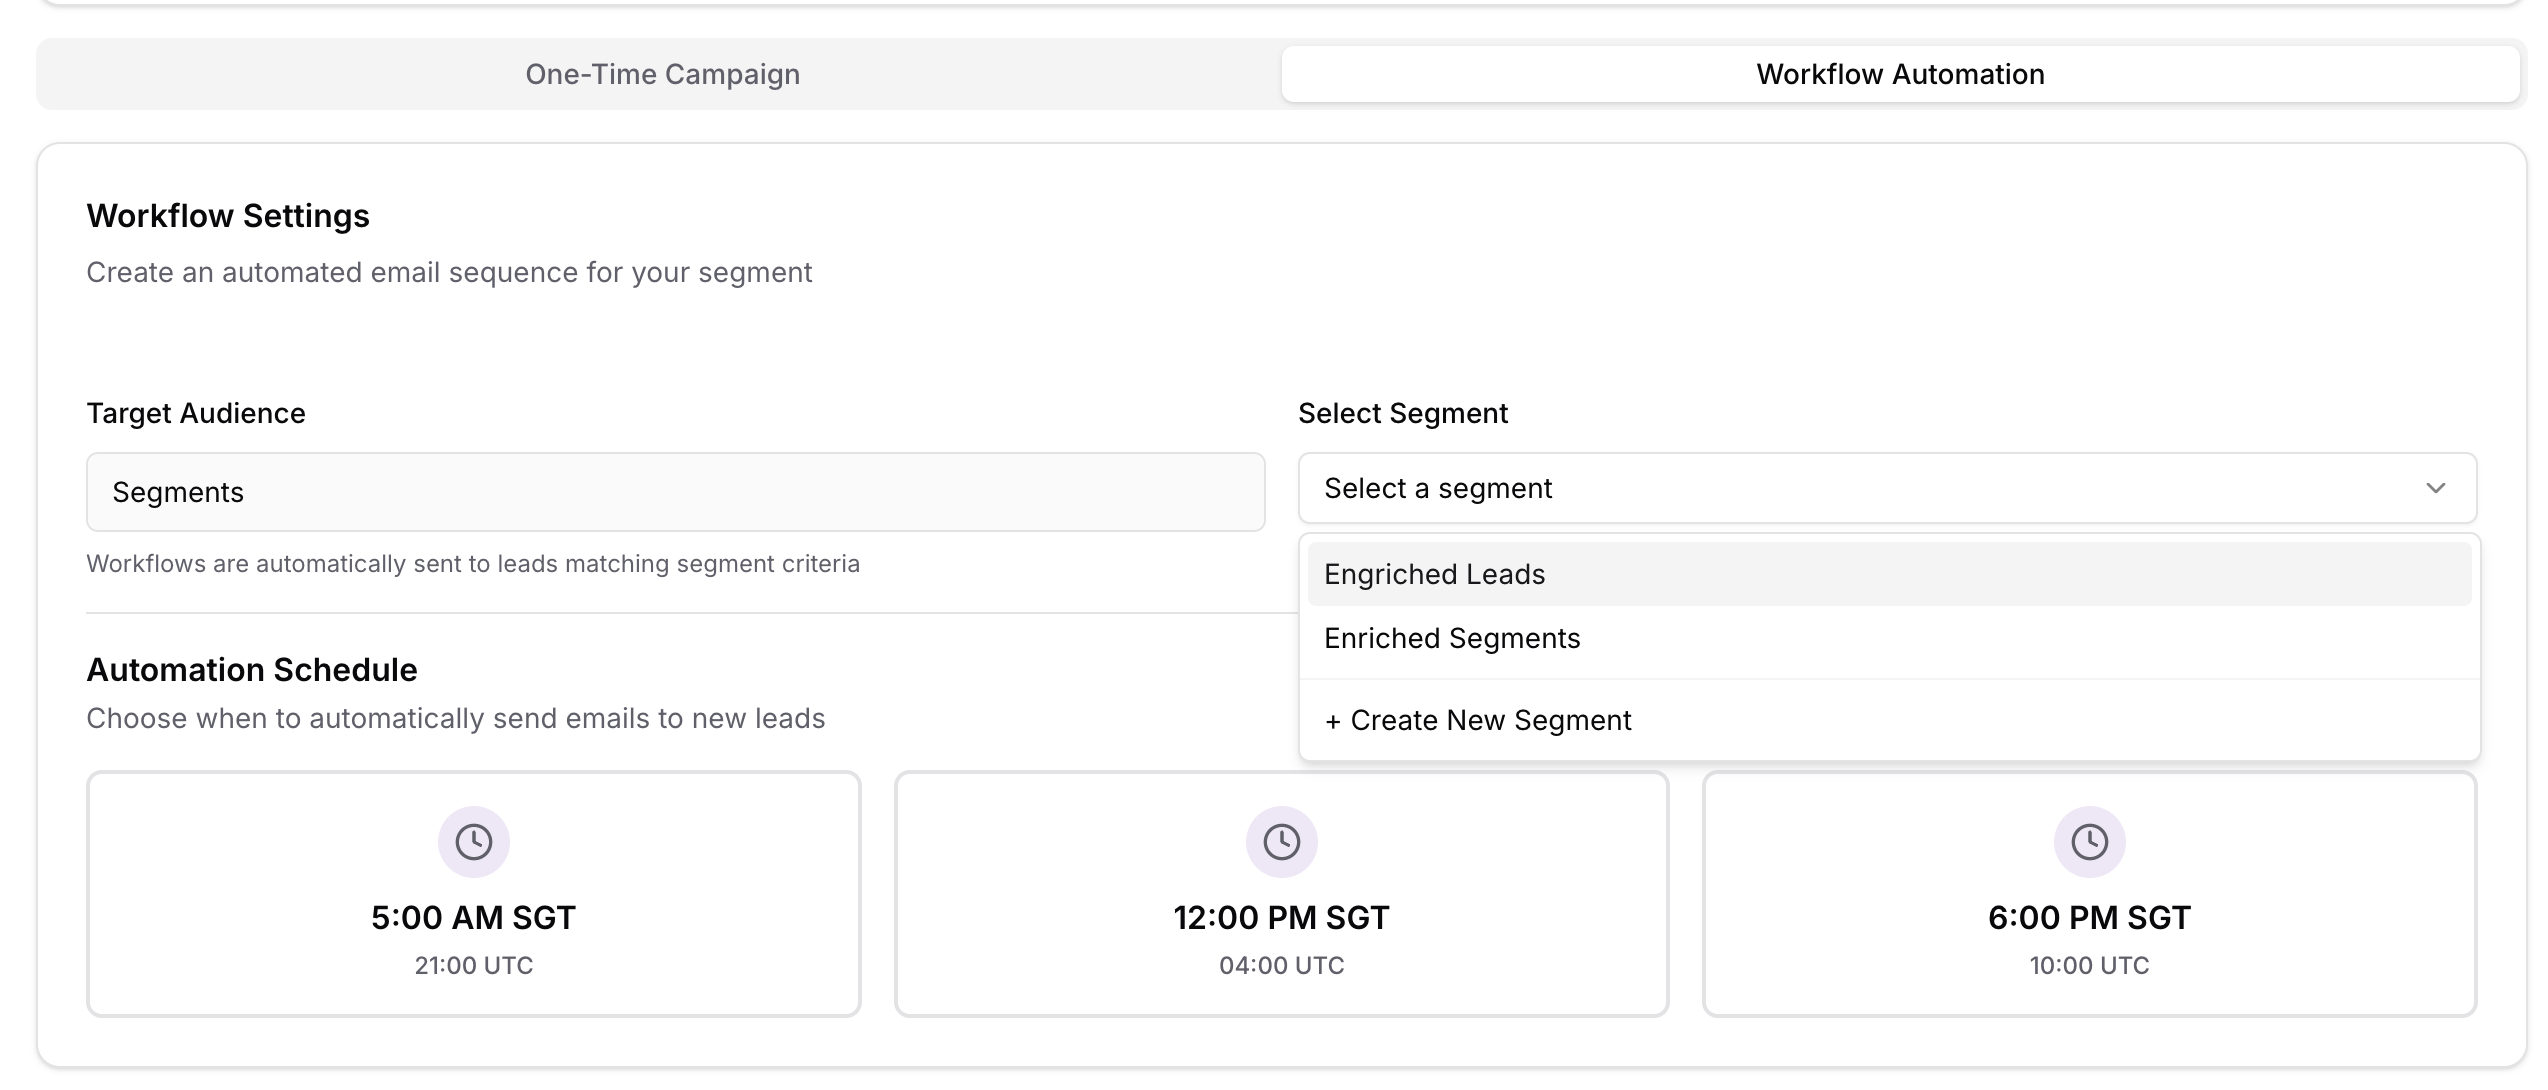
For Workflow Automation
Segment
You must choose one Lead Segment. Only leads in that segment receive the sequence. The segment is re evaluated over time (e.g. "Visited pricing but didn't sign up"), so new matching leads are added automatically. You also must set a schedule (e.g. 4 AM, 10 AM, or 9 PM UTC) so the system knows when to run the workflow each day.
Loading image...
Target Count & Quota Estimation
As you configure targeting, the wizard shows how many leads will receive emails and how much quota is needed. If you don't have enough quota, you'll see a red warning—upgrade your plan or reduce the campaign size. Quota is charged per email sent (not upfront); if you pause a campaign, you're only charged for emails already sent.
Build Your Email Sequence
What you build depends on the tab.
Loading image...
One-Time Campaign
- One email only. One subject, one body. When you click Start Campaign, that single email is sent to your audience (list or all leads).
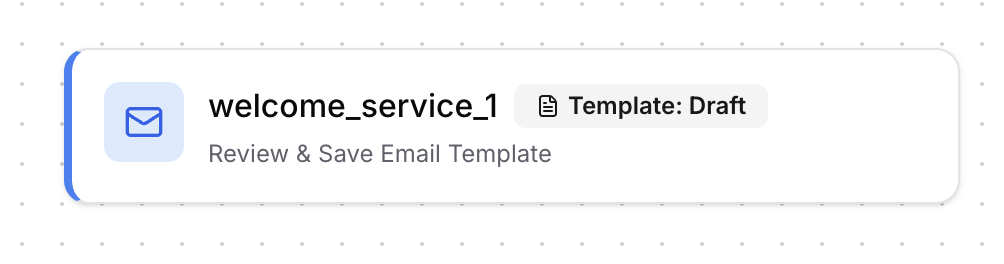
Workflow Automation
Multiple emails in a sequence. Add two or more steps; for each, set subject, body, and delay in days. The system sends the first email when a lead enters the segment, then follow
ups automatically by the delays you set.
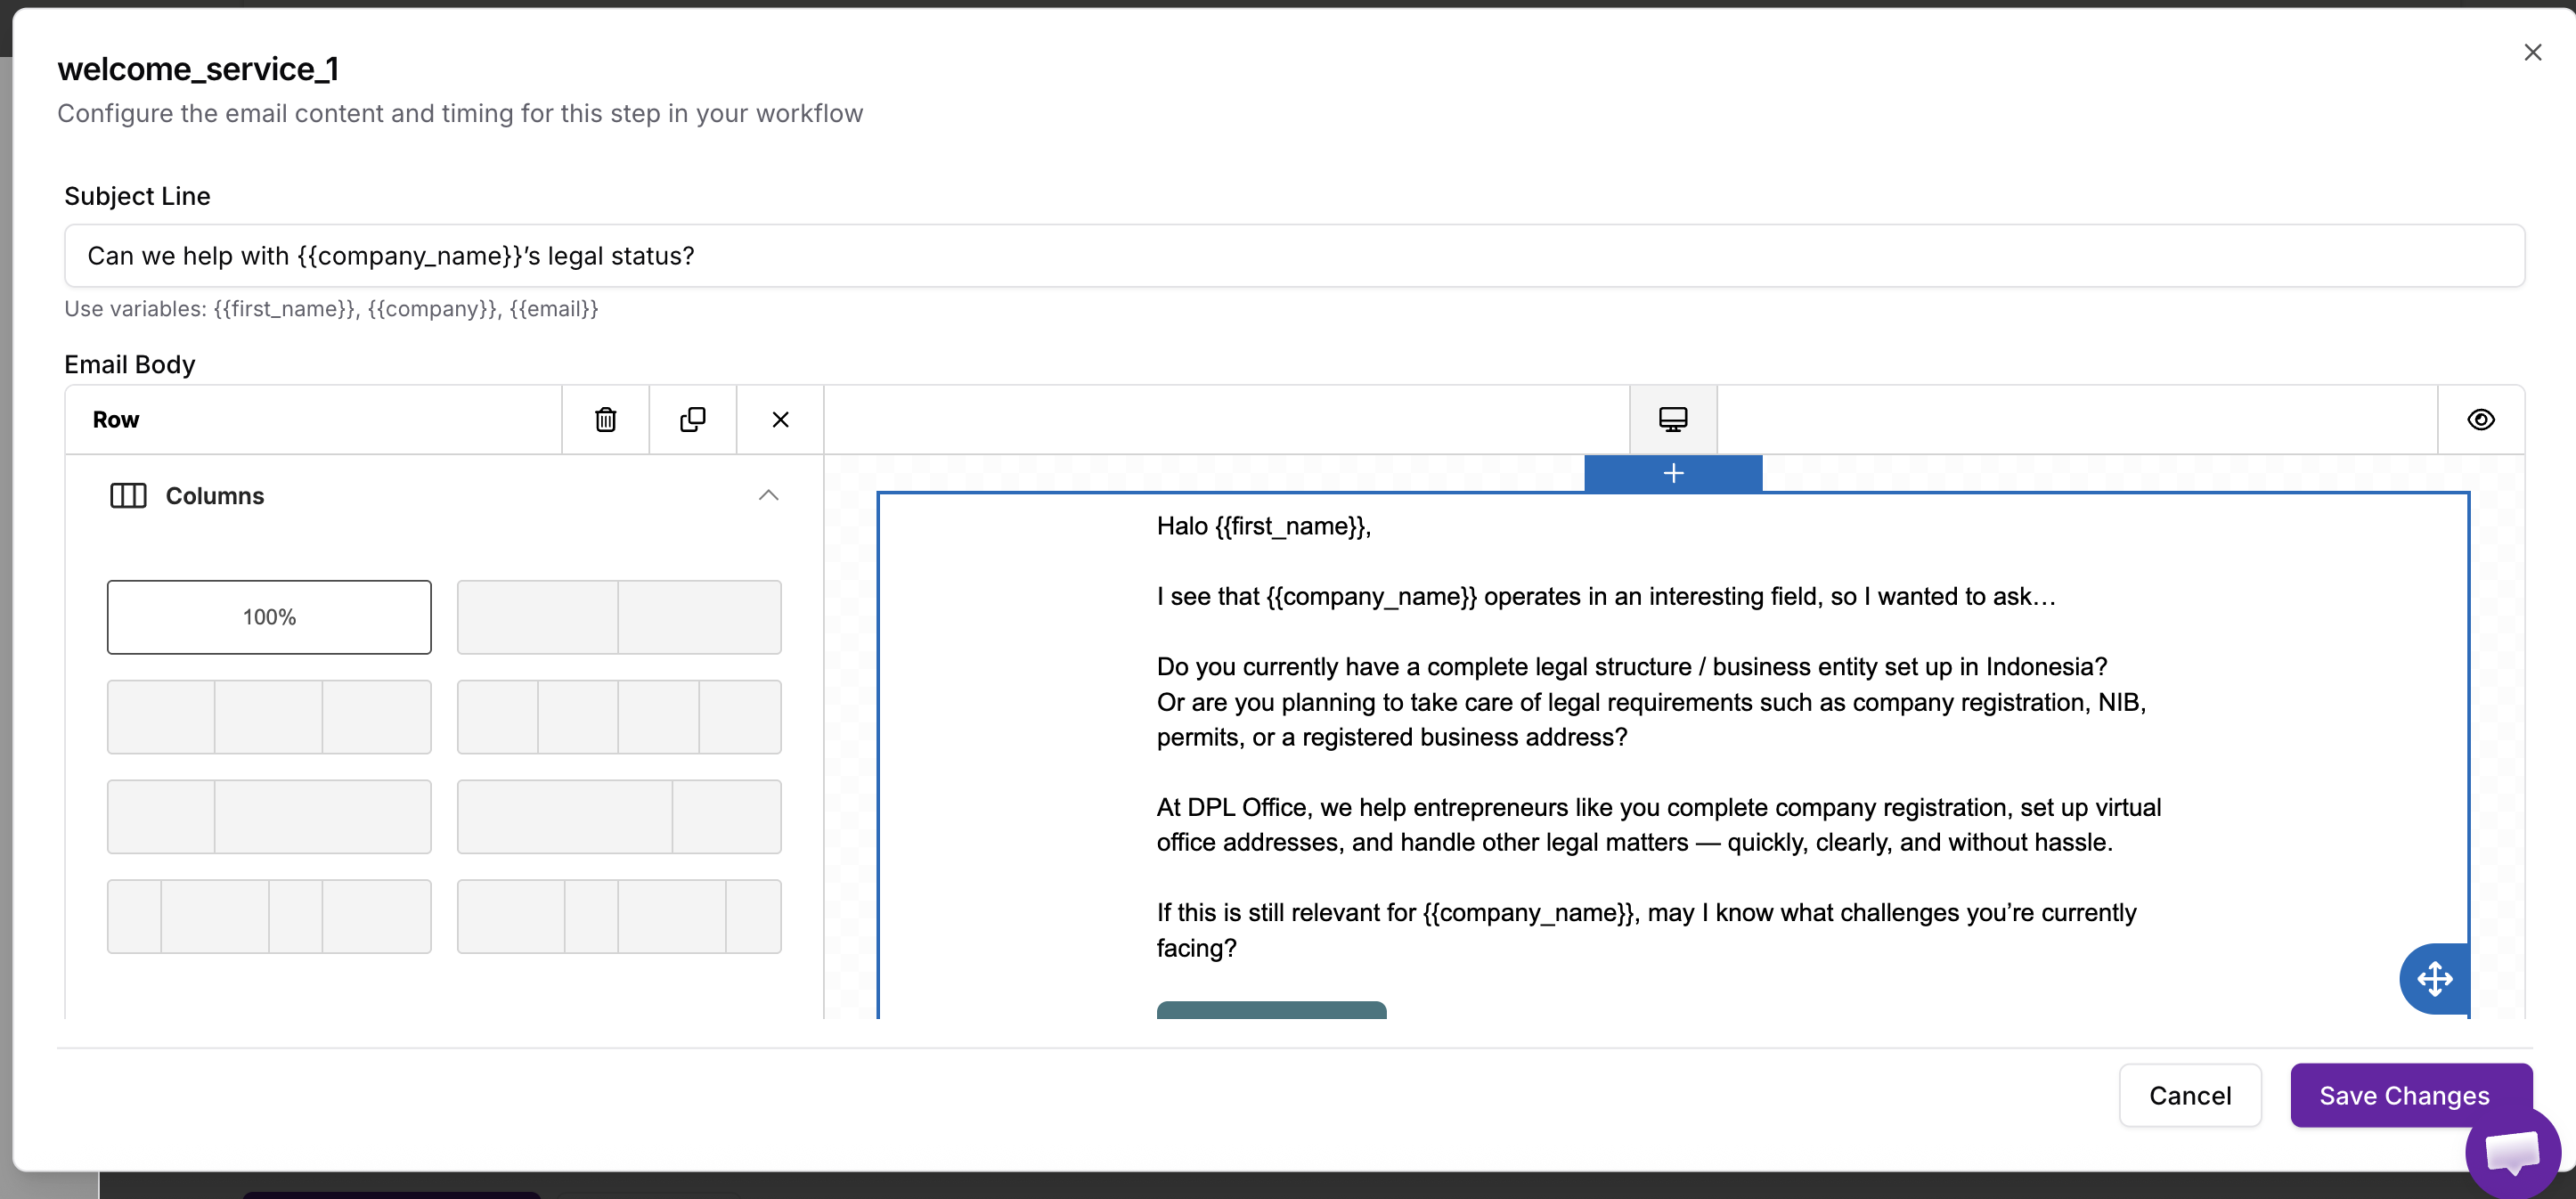
Customize Email Content
Use the rich text editor to craft compelling email content.
Loading image...
Email Editor Features
Formatting toolbar:
- Text Styling: Bold, italic, underline, headings
- Lists: Bulleted lists, numbered lists
- Links: Insert clickable links (use UTM parameters for tracking)
- Images: Embed images from URLs or upload
- Alignment: Left, center, right alignment
- Colors: Text color, background color (use brand colors)
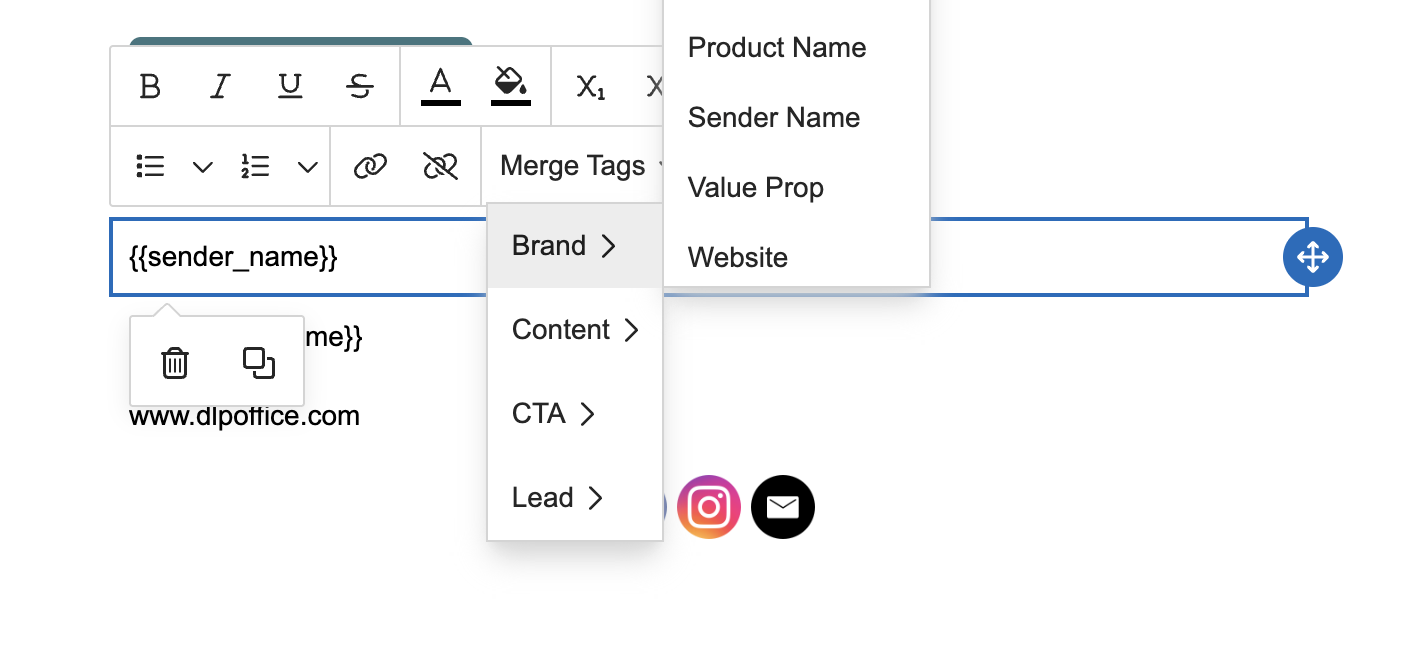
Personalization variables:
Insert variables that automatically replace with lead-specific data:
Lead data variables:
{{full_name}}→ "John Smith"{{first_name}}→ "John"{{last_name}}→ "Smith"{{company_name}}→ "Acme Corp"{{job_title}}→ "Marketing Manager"{{email}}→ "john@acme.com"
Brand asset variables:
{{business_name}}→ Your brand name from Brand Assets{{value_proposition}}→ Your first value prop
{{cta_label}} → Your CTA button text
{{sender_name}} → From your email signature
Loading image...
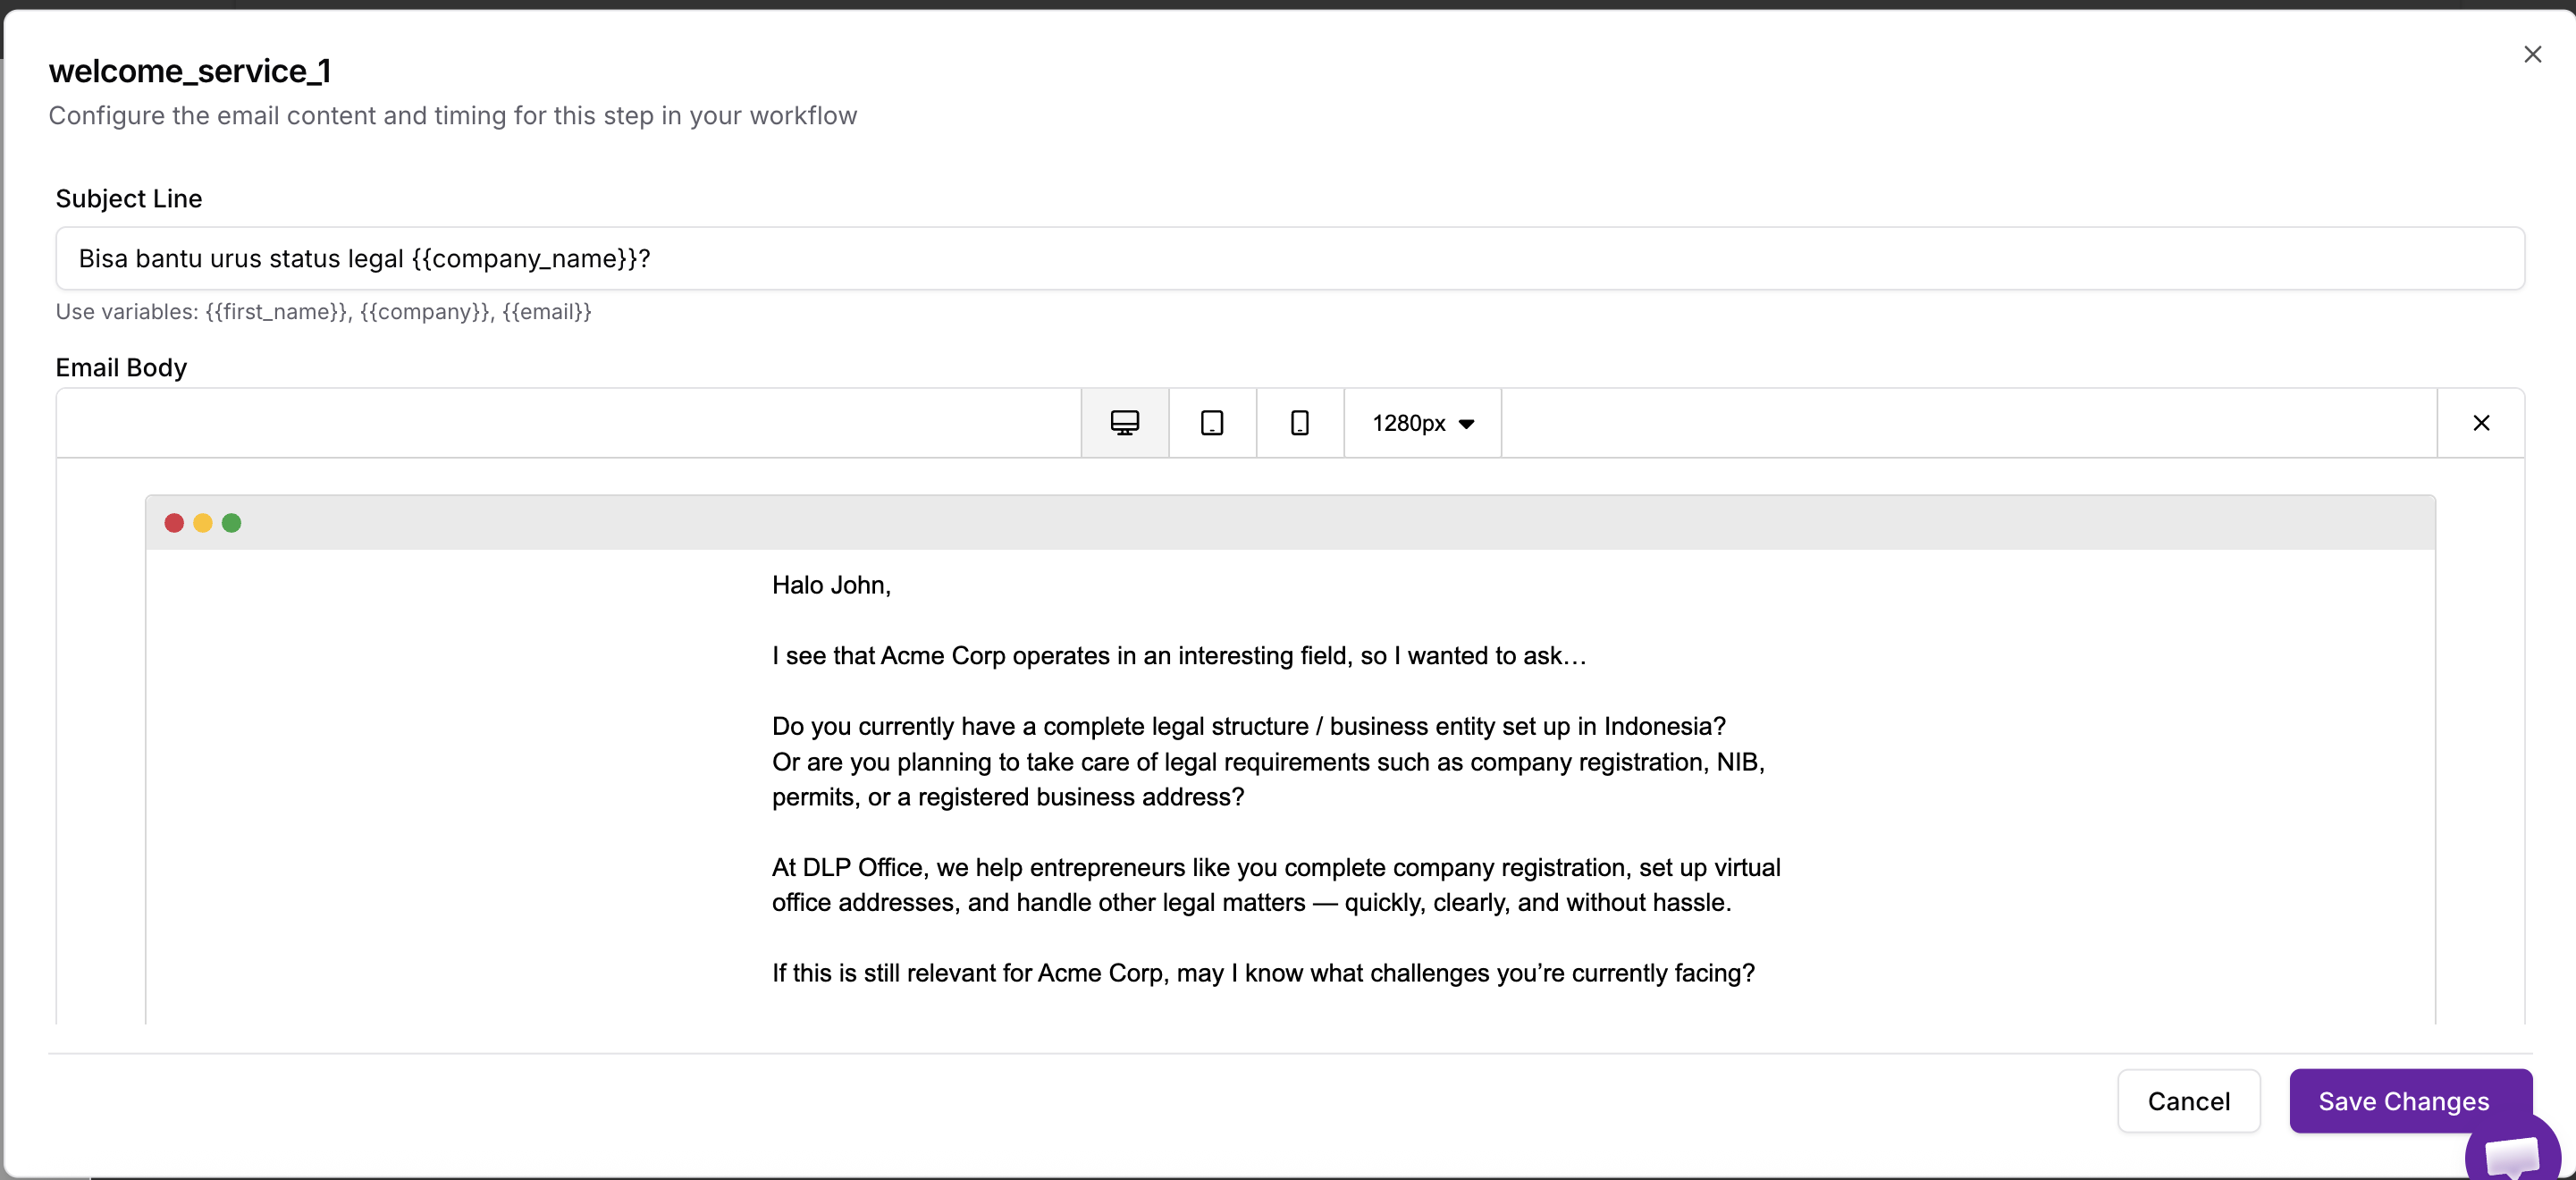
Template Preview
Click "Preview" to see how your email will look:
- View with sample lead data (variables replaced with examples)
- Check formatting on desktop and mobile
- Verify links work correctly
- Test with different email clients (Gmail, Outlook, Apple Mail)
Loading image...
Pro Tip
{{first_name}} in both subject line and opening sentence. Personalized emails have 26% higher open rates than generic ones.Select Sending Domain
Choose which verified domain sends your campaign emails.
Loading image...
Domain Selection Criteria
Pick a verified domain (green checkmark). The wizard shows daily sending capacity and how much is left today. New domains have lower limits at first; after warmup, you get full capacity. If your campaign is larger than the daily limit, emails are sent over several days automatically.
Select Email Signature
Choose which email signature appears in your campaign emails.
Loading image...
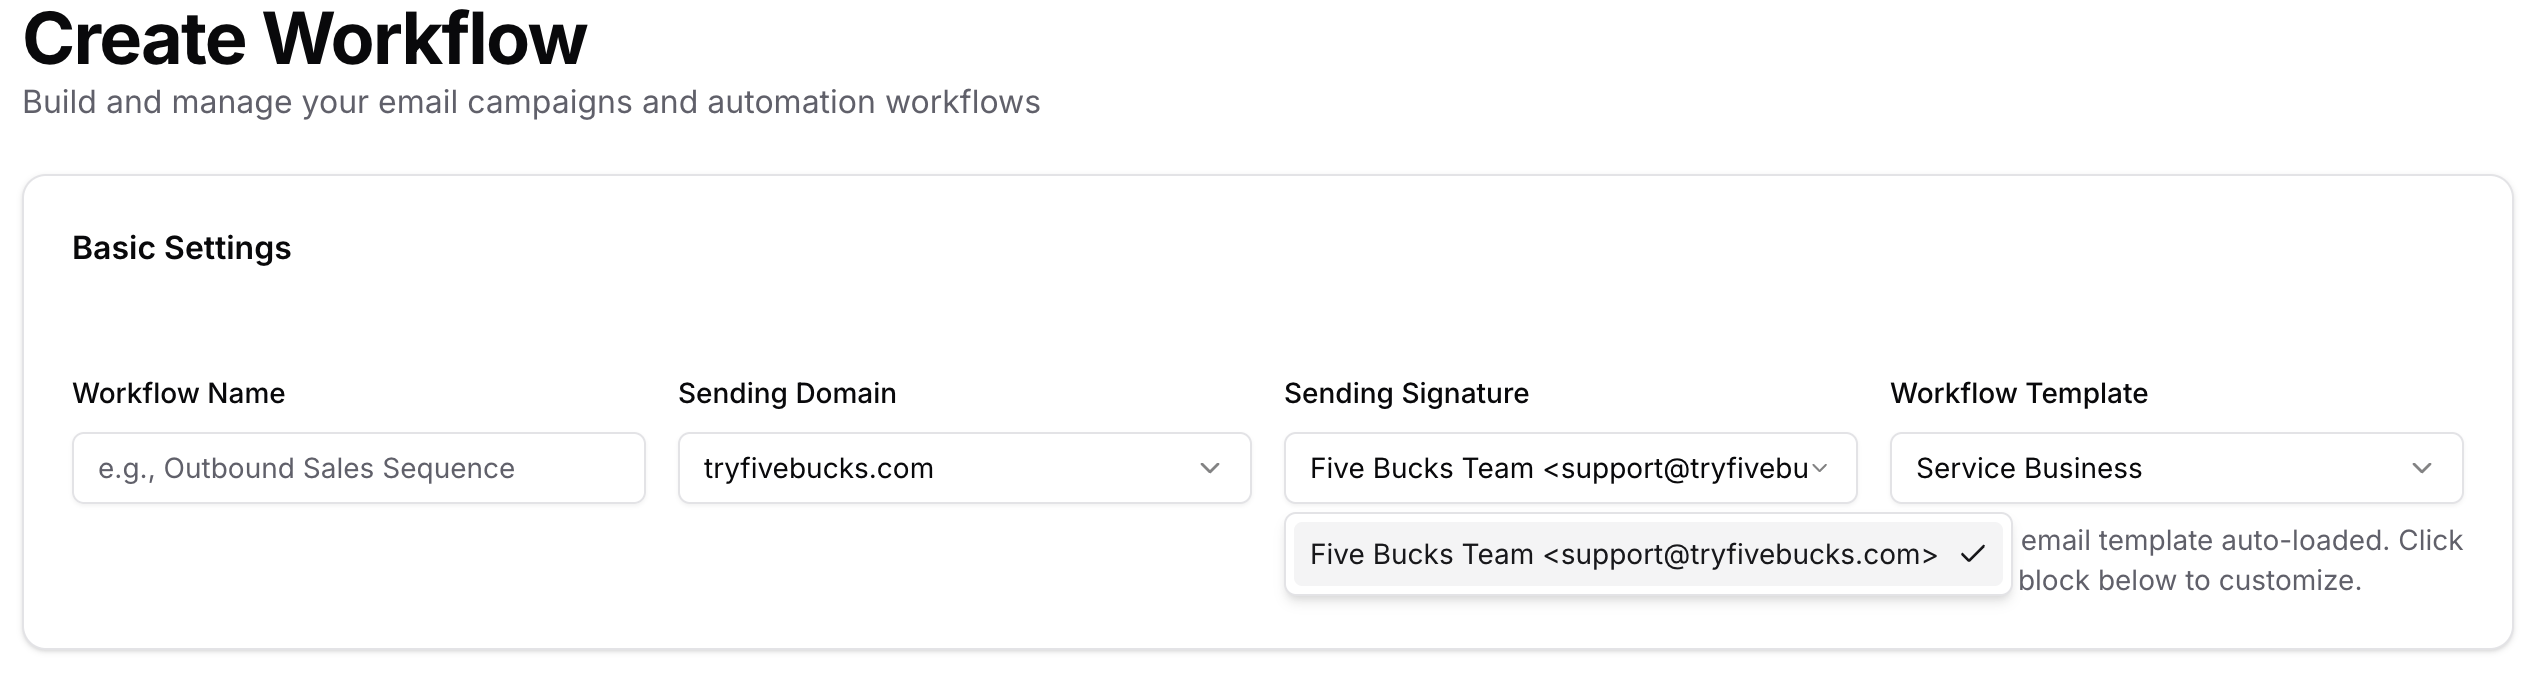
Signature requirements:
- ✅ Confirmed: Signature email must be confirmed (verification link clicked)
- ✅ Matches Domain: Signature domain should match sending domain (e.g., john@acme.com for acme.com)
Signature displays:
From Name: Sender name displayed in recipient's inbox
e.g., "John Smith"
From Email: Sender email address
e.g., "john@acme.com"
Reply
To: Optional different email for replies
- Confirmation Status: Green checkmark if confirmed
Pro Tip
Review Quota & Create Campaign
Final review before launching your campaign.
Loading image...
Review summary shows:
- Campaign Name: Workflow name you entered
- Targeting: Who receives emails (list/segment/filter summary)
- Target Count: Number of leads
Email Sequence: Number of emails in sequence
Total Emails: Target count × sequence length
Quota Required: Total emails × 0.01
Signature: Selected email signature
- Signature: Selected email signature
- Automation: Schedule time (if configured)
Example review:
- Target: "SaaS Trial Users" segment (320 leads)
Sequence: 3 emails
Total Emails: 960
- Quota Required: 9.6 quota
- Quota Available: 50 quota ✅
Loading image...
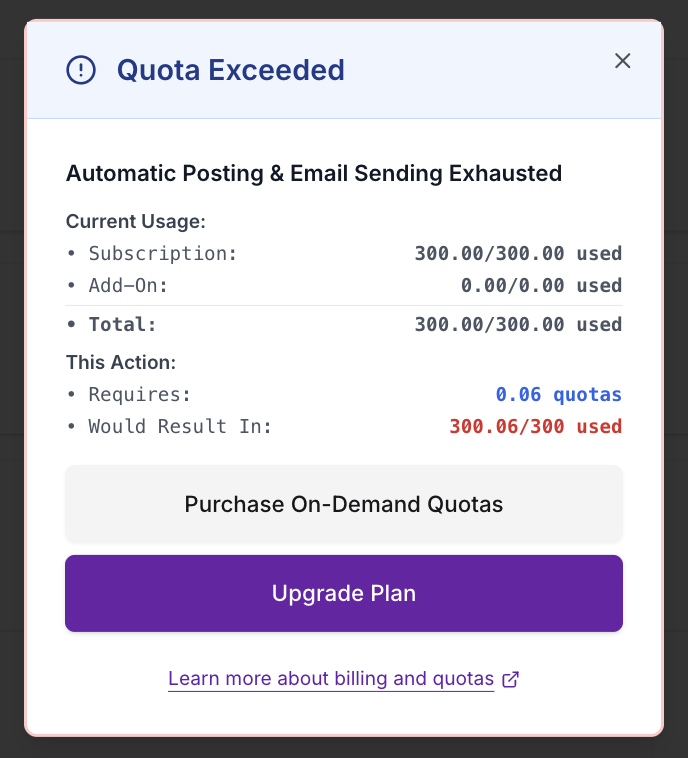
Quota Validation
Before clicking "Create Campaign", system checks:
- ✅ Quota Available: Remaining quota ≥ estimated usage
- ❌ Quota Exceeded: Red warning with upgrade link if insufficient
If quota insufficient:
- Click "Upgrade Plan" link to increase quota
- Or reduce target count (narrow targeting)
- Or reduce email sequence length (fewer follow-ups)
Click "Create Campaign" to finalize.
Campaign Created Successfully
Your campaign is created and ready to send.
Success confirmation shows:
- ✅ "Campaign created successfully" message
- Campaign name
- Status: Inactive (gray badge)
- Options:
What happens when you click "Start Now":
- Workflow status changes to Active (green badge)
- System evaluates targeting criteria to get matching leads
- System filters out leads already in this workflow (no duplicates)
- System checks domain sending limits
- System schedules first email for each lead
- Emails begin sending (respecting warmup limits)
- Follow-up emails scheduled based on the delay you set for each step
Pro Tip
Monitor Active Campaign
Track campaign performance in real-time.
Loading image...
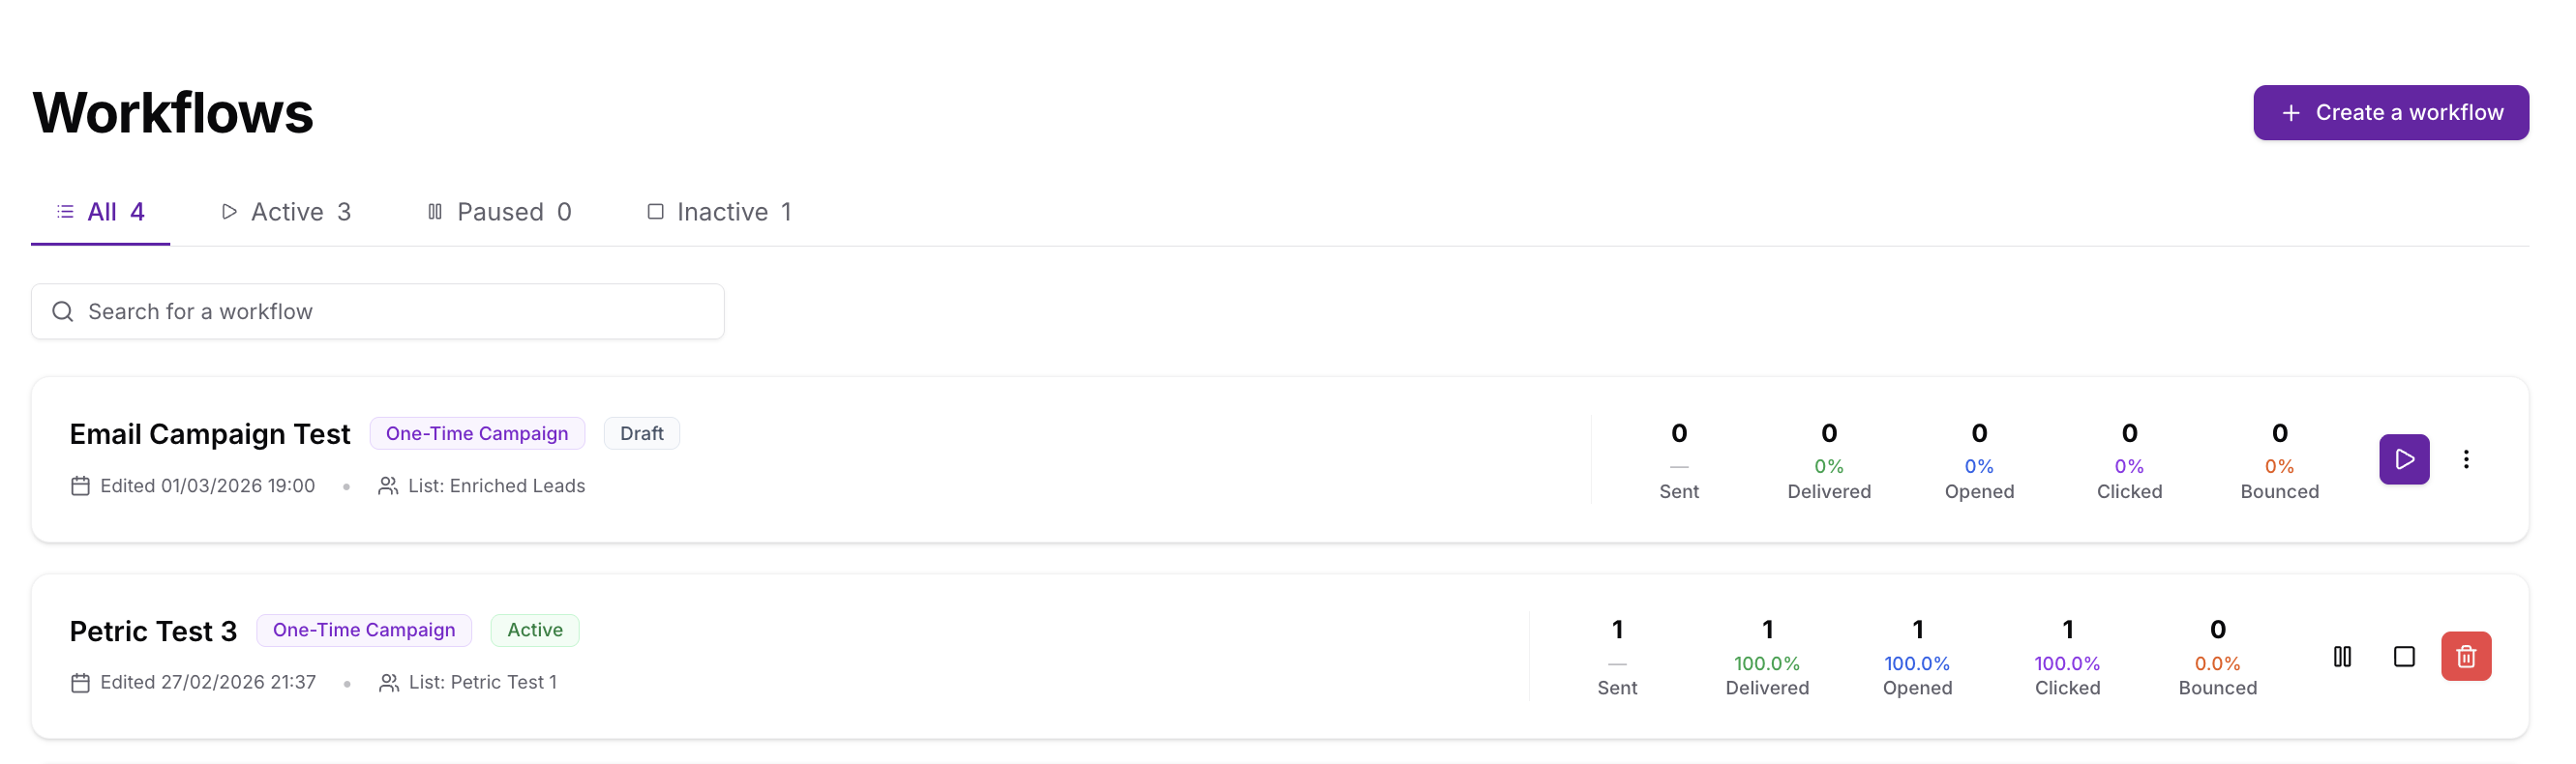
Campaign Statistics
Each workflow card displays:
- Status Badge: Active (green), Paused (yellow), or Inactive (gray)
Total Sent: Count of emails with 'sent' status
Opened: Count of emails opened
tracked via pixel
Bounced: Count of bounced emails
invalid address, full inbox
Last Sent: Timestamp of most recent email
- Failed: Count of failed sends
- Open Rate: (Opened ÷ Sent) × 100%
- Click Rate: (Clicked ÷ Sent) × 100%
- Last Sent: Timestamp of most recent email
Example statistics:
- Sent: 450
- Opened: 180 (40% open rate) ✅ Good
- Clicked: 45 (10% click rate) ✅ Good
- Bounced: 5 (1.1% bounce rate) ✅ Healthy
- Failed: 0 ✅ Excellent
Metric benchmarks:
- Open Rate: 20-40% typical for cold outreach, 40-60% for warm leads
- Click Rate: 2-5% typical for cold outreach, 5-15% for engaged leads
- Bounce Rate: <2% healthy, 2-5% concerning, >5% critical (damages reputation)
- Click-to-Open Rate: (Clicked ÷ Opened) × 100%—measures content quality (aim for >10%)
Campaign Management Actions
Pause Campaign
Temporarily stop a running campaign.
Loading image...

To pause:
- Find Active campaign in list
- Click "Pause" button
- Status changes to Paused (yellow badge)
What pausing does:
- ❌ Stops evaluating targeting (no new leads enter sequence)
- ❌ Stops sending first emails to new leads
- ✅ Allows already-scheduled follow-ups to complete
- ✅ Preserves all campaign data and statistics
When to pause:
- Testing or debugging email content
- Updating targeting criteria or templates
- Approaching daily sending limits
- Need to review performance before continuing
Resume Campaign
Reactivate a paused campaign.
Loading image...

To resume:
- Find Paused campaign
- Click "Resume" button
- Status changes to Active (green badge)
Resume behavior:
- ✅ Resumes evaluating targeting
- ✅ Begins sending to new leads matching criteria
- ✅ Continues from where it paused (no duplicates)
- ✅ Existing leads in sequence continue receiving follow-ups
Delete Campaign
Permanently remove a campaign.
Loading image...

To delete:
- Click "Delete" button
- Confirm deletion in dialog
- Campaign removed immediately
What gets deleted:
- ✅ The campaign (workflow)
- ✅ All send tracking (sent/opened/clicked)
- ✅ Scheduled follow-ups for leads in sequence
What is NOT deleted:
- ❌ Leads themselves (remain in your project)
- ❌ Already-sent emails (can't "unsend")
- ❌ Domain, signature, brand assets (remain for other campaigns)
Understanding Background Processing
Large campaigns are sent in the background so the page doesn't time out. You can close the browser and emails will keep sending. Refresh the page to see progress.
Troubleshooting
Campaign Not Sending Emails
Problem: Campaign status is Active but no emails sending
Solutions:
- Check domain verification - Go to Domain Verification, verify green checkmarks
- Check daily sending limits - Go to Email Setup, check "Remaining" capacity (if 0, wait until midnight UTC)
- Verify signature confirmed - Unconfirmed signatures block sending
- Check targeting matches leads - If segment has 0 leads, no emails send
- Verify warmup status - Day 1 domain limited to 5 emails/day
- Check quota available - Need 0.01 quota per email
- Check browser - Refresh the page or try a different browser if something looks wrong
Low Open Rates (<15%)
Problem: Emails sending but very few opens
Causes & Solutions:
1. Poor subject lines
- ❌ "Newsletter #47" → ✅ "{{first_name}}, quick question about {{company_name}}"
- ❌ "Important update" → ✅ "Your demo is ready (2 min video inside)"
- ❌ "FREE OFFER!!!" → ✅ "Exclusive for {{company_name}}: 50% off"
- Test: Use personalization, create curiosity, avoid spam words
2. Sender reputation issues
- Check bounce rate (>5% damages reputation)
- Use a verified domain (not gmail.com)
3. Emails going to spam
- Avoid spam trigger words: "free", "guarantee", "act now", "limited time"
- Include physical address in footer (legal requirement)
- Don't use all caps: "CLICK HERE" → "Click here"
- Use more text than images in the email
4. Targeting wrong audience
- Verify email addresses valid (use email verification tool)
- Ensure targeting matches your ideal customers
- Remove inactive leads (no engagement in 6+ months)
Low Click Rates (<2%)
Problem: Good opens but few clicks
Causes & Solutions:
1. Weak or unclear CTA
- ❌ "Click here" → ✅ "Schedule Your Demo"
❌ Multiple CTAs → ✅ One primary CTA per email
❌ Text link → ✅ Prominent button with brand colors
2. Too much text
- ❌ 500-word email → ✅ 100-200 words for cold outreach
- Use bullet points for scannability
- Put CTA above the fold (visible without scrolling)
3. Irrelevant content
- Match content to lead's industry/role
- Reference specific actions: "You visited our pricing page..."
- Tailor value prop to their needs
4. Broken or suspicious links
- Test all links before sending
- Use branded URLs (not bit.ly shorteners)
- Avoid multiple domains in one email
High Bounce Rate (>5%)
Problem: Many emails bouncing, damaging sender reputation
Causes & Solutions:
1. Invalid email addresses
Use an email verification tool before importing
Fix typos: "gmial.com" → "gmail.com"
Delete fake emails: "test@test.com", "noreply@example.com"
2. Old lead lists
- Email addresses expire (people change jobs)
- Re-verify lists older than 6 months
- Remove hard bounces from future campaigns
3. Corporate email filters
- Some companies block all external emails
- Try different person at same company
- Use LinkedIn InMail as alternative
Quota Issues
Problem: "Insufficient quota" error when starting campaign
Solutions:
1. Upgrade plan
- Click "Upgrade Plan" link in quota tooltip
- Higher tiers include more quota
2. Purchase quota add-on
- Buy additional quota credits
- Add-ons available in billing settings
3. Reduce campaign size
- Narrow targeting (smaller segment/list)
- Reduce email sequence length (fewer follow-ups)
- Split into multiple smaller campaigns
4. Wait for quota reset
- Some plans have monthly quota reset
- Check your billing cycle